
So in the last two articles we’ve covered the role the Royal Australian Navy had played around the periphery of the war, the action in Rabaul right at the start of things, escorting the first convoy, involvement in the Gallipoli campaign and the patrolling undertaken by the HMAS Psyche. But, just as it was on the land, the only real chance of bringing the war to a successful conclusion was to directly target the German forces in Europe.
One of Germany’s main problems throughout the war was access to resources, whether it was food, mineral resources such as steel, oil and coal, or just the myriad things required to keep a society fit, healthy and fighting. Their conquests in the early months helped their situation to some degree, but with Russia on one side and France on the other, their only real option for importing supplies was either from the south, through Austria or via the North Sea. The south wasn’t much of an option as Austria was tussling with Italy and so most of the southern trading ports were inaccessible.
They did have colonial possessions in East Africa which could provide some resources, but the Allies had control of the Suez Canal, and the Turks didn’t seem able to take control. So that meant transporting anything from German East Africa, would require going all the way around Africa, in waters controlled by the Allies.
So basically, the southern supply route was”¦.problematic.
The other way into Germany was the north. This was also a problem though. Any shipping attempting to make it into German ports had to run the gauntlet around England, Belgium and France and into the North Sea. This also was a terrible option.
By 1916 the German raiders in the Pacific had been dealt with and its only real Naval Force, the High Seas Fleet, was safely at anchor in Germany. They knew that to venture out of port would be a monumental risk which would bring them face to face with the Royal Navy, the masters of the sea for hundreds of years. They had to ask themselves, what are we going to do about this?
Meanwhile from the Allied point of view, the way forward was pretty simple. The only real place Germany could import resources from was her East African colonies. The only way into Germany was through the North Sea. The obvious solution? Blockade any shipping out of German East Africa and block any shipping trying to make it into the North Sea. They could also keep the High Seas Fleet bottled up while patrolling the North Sea, thereby preventing attacks on their own merchant shipping.
It may not be exciting warfare, but at least it wouldn’t cost too many lives.
The Germans did come up with a solution of sorts, but we’ll get that in good time.
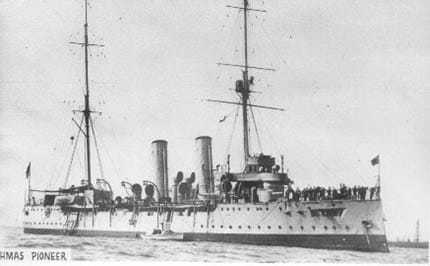
First up, let’s have squiz at the blockade of German East Africa. The RAN’s involvement in the blockade pretty much consisted of HMAS Pioneer.
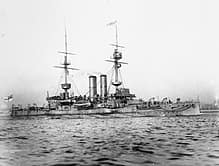
Pioneer was commissioned into the Royal Navy on 10 July 1900. Ever get the feeling that Royal Australian Navy just consisted mostly of second-hand Royal Navy vessels??
Anyway, she displaced 2 200 tones, which I assume means something to any old salts reading, and was armed with eight 4-inch guns, eight 3 pounder guns and a few machine guns and two torpedo tubes. She arrived in Australia in October 1905 as part of the Royal Navy’s Australia station and was eventually handed over and commissioned into the RAN on 1 March 1913 where she was used as a training ship.
She was in dry dock in Melbourne when war broke out, but in what must’ve been some kind of record, within 24 hours she was back in the water, provisioned, armed and coaled up and ready to roll. She headed straight to Fremantle from whence she began patrolling the West Australian coast.
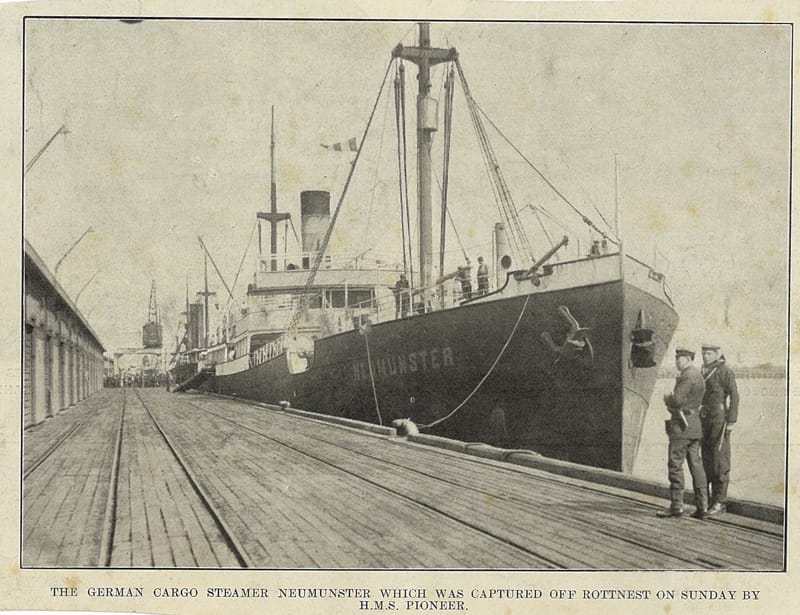
On 16 August, just west of Rottnest Island she captured the German steamer Neumunster and took her into Freo, after which she headed back to sea and on the 26 August captured the vessel Thuringen. This sounds like a pretty impressive achievement, until you realise that neither ship had wireless communication, and as a result had no idea at the time that Germany was even at war.
You’d like to be a fly on the wall for that conversation wouldn’t you.
“We’re seizing your ship.”
“Vy”
“Oh, um because we’re at war.”
“Vat?”
“War, ya know. Dead Archduke in Serbia? Russia and France, alliance. Schlieffen Plan. Belgium, British ultimatum? No???”
“Mein Gott. Vere are you hiding the Schnapps, you drunken fool”.
And on it would go.
Pioneer initially formed part of the escort of the first troop convoy in November but in one of those seemingly innocuous little twists that can change the direction of someone’s war, her engine failed and she was ordered to return to Fremantle for repairs. It was while undergoing these repairs that she was requested by the British Admiralty to assist in the first part of their ‘starve Germany’ plan – the blockade of German East Africa.
If her engine hadn’t had some trouble and she sailed all the way with the convoy, she may well have been involved in the Battle of Jutland, maybe sunk by a German U-Boat, or just spent her time dodging icebergs in the North Sea. Instead, she headed off to the tropical waters off what is now the countries of Rwanda, Mozambique and Tanzania, more or less.
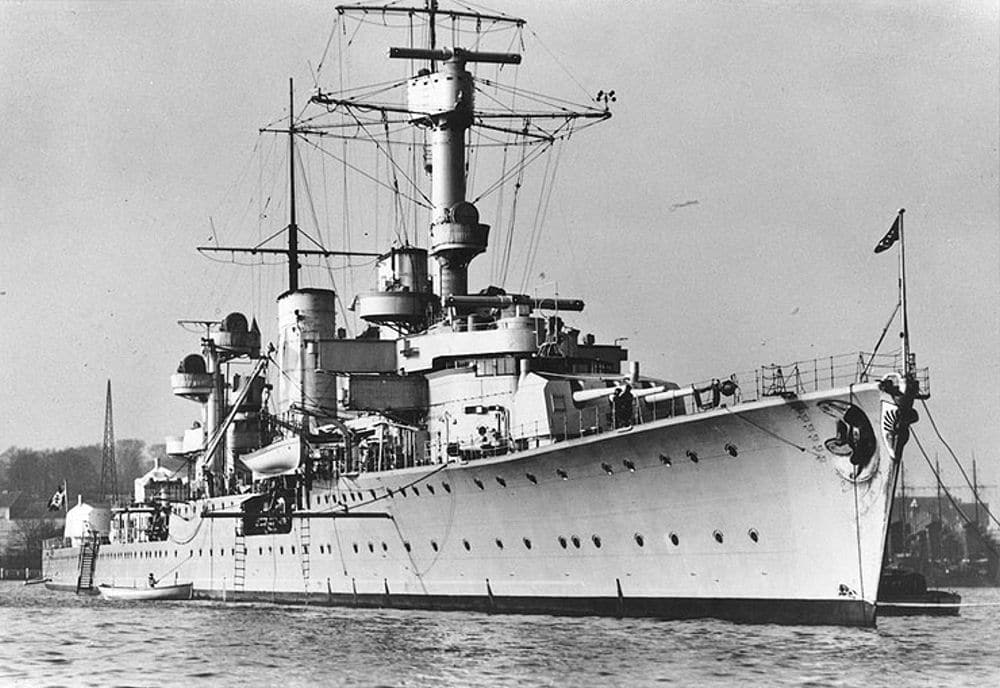
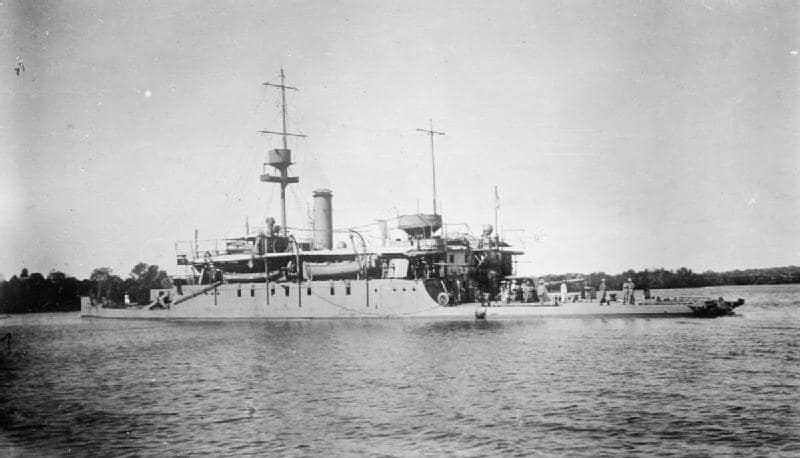
The German cruiser Konigsberg had been causing some problems during the opening months of the war, she’d even managed to sink Pioneer’s sister ship, the HMS Pegasus. So you can just imagine what it would’ve been like to receive orders to go and help take on an enemy who has already proved themselves capable of defeating a similar vessel to yourself.
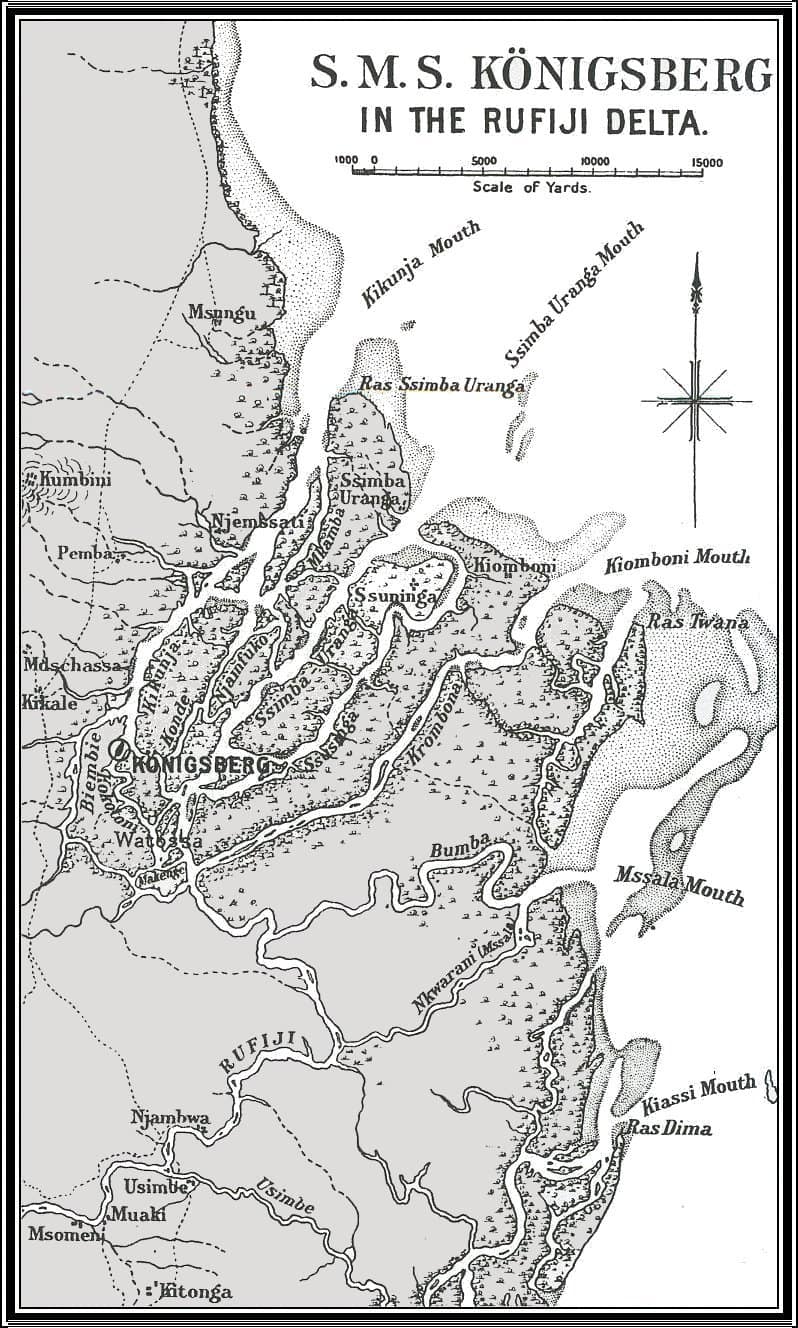
Nonetheless, on 9 January 1915, as soon as her repairs were completed, she sailed to join the British force off Zanzibar. Seeing the forces being gathered against him, the Commander of the Konigsberg, Max Looff, performed a sneaky bit of manoeuvring and sailed up the Rufiji River delta. Having a shallower draft than the English ships, he successfully moved out of their range. Technically, all he had to do was wait for an opportunity to present itself and he could slip out to sea and continue his raiding.
This meant the British fleet now had two tasks on hand, blockade merchant shipping and keep an eye on an obviously clever German raider commander. On station when Pioneer arrived were the British ships Weymouth, Hyacinth, Pyramus, the merchant vessel Kinfauns Castle and a number of smaller vessels. The HMS Goliath rolled up shortly after with Vice Admiral Sir HG King-Hall who took command of the whole operation.
King-Hall divided the coastline into three sections, assigning the vessels under his command among these sections. Pioneer was ordered to the northernmost section and placed in charge of Kinfauns Castle and a couple of smaller ships. There wasn’t much doing up on the northern section, mostly native fishing vessels going about their business. But it was in that sector that Konigsberg was sheltering and waiting.
Intercepted radio traffic indicated that Looff was about to make his attempt to break the blockade.
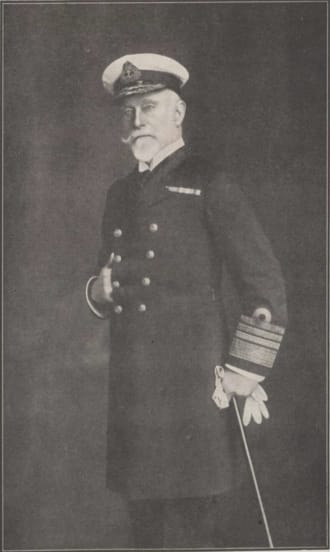
The Admiral though, had other ideas. Allowing the German room to manoeuvre probably wouldn’t be a good idea, so attacking her in the confines of the Delta would be preferable. He just needed some ships with a shallow enough draft to get in there. Fortunately, he had two such vessels, HMS Severn and Mersey. Both were designed for river work and although they were technically outgunned by Konigsberg their shallower draft gave them the advantage of mobility. Looff needed to be a bit more cautious about where he put his ship to avoid running aground.
While the two vessels were making their way into the shallows, Pioneer was ordered to bombard the defences on the southern edge of the Delta at Simba-Uragana. On the early morning of 6 July 1915, the operation began. Surgeon Lieutenant GA Melville-Anderson was on the Pioneer and described the action:
On we went, very cautiously, and when we were about 5000 yards from the river entrance, we dropped anchor and allowed the tide to swing us broadside on. Hence all our starboard guns bore on the entrance. Previous to anchoring, a shell burst in the water not far from the ship, and another in the air. No one knew from whence they came. Very soon we were firing salvoes and then each gun rapidly independently. Our shells were bursting everywhere, throwing up great clouds of sand and earth. No sign of life was visible in the neighbourhood. In the meantime, the monitors were steaming up the river under heavy fire from the banks, but they went on and soon were within range of the Königsberg. They then directed their fire on her, the range being five miles. Seaplanes assisted the monitors in locating the position, but they were not very successful. The Königsberg fired salvoes of five guns, the accuracy of which was good. From firing salvoes of five guns she dropped to four then to three and two and finally one. During the last hour-and-a-half of the engagement she ceased fire altogether. One of her shells hit the forward gun of Mersey and practically wiped out that gun’s crew – four men were killed and four wounded.
Despite the hammering they’d inflicted on the Konigsberg she had not been destroyed and could still be a problem. The monitors were withdrawn at 3:30pm, having fired 600 shells. Now, I’m no expert on naval warfare, but 600 shells aimed at a single ship over a number of hours and that ship is still floating, doesn’t really say much for those doing the firing.
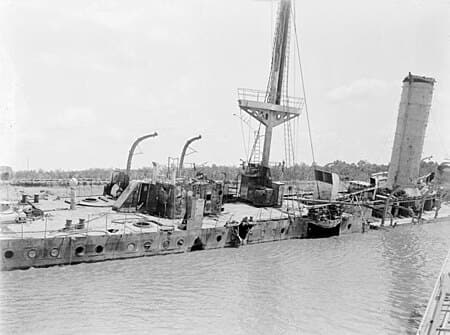
With the German vessel still a threat another operation was conducted on 12 July. The Severn was fired upon while moving into position, but the shots straddled her and did no damage. In response she fired several volleys at Konigsberg and this time managed to cause significant damage and the German crew decided that their best course of action was to send her to the bottom themselves. They set demolition charges, abandoned ship and she went to the bottom.
While all this was going on, Pioneer had once again taken up her previous station and was bombarding the German shore defences.
With Konigsberg out of the way, the main threat to Allied shipping in the region was alleviated. Pioneer now turned her attention towards patrolling the coast of East Africa. It was monotonous, unrewarding work with very few distractions. However, on 20 December 1915, while anchored in Nazi Bay, a cutter was sent ashore to obtain fresh provisions. Before the cutter reached land the crew was fired on by enemy soldiers and two men were wounded. Pioneer opened up and sent 50 of her 4-inch shells shore-ward, silencing the enemy and then retrieved their wounded who were then transferred to Severn.
After 287 days of continual service, covering over 29 000 miles, in February 1916 Pioneer was ordered back to Australia. Before she’d left Australia, The Admiralty had promised the Australian Government that Pioneer would be permitted to return after a short period of service and this was them making good on that promise.
But, as always happens in military circles, after giving Pioneer clearance to return home, command of the Anglo South African forces in East Africa was handed over to General Jan Smuts. Anyone who has looked into the Boer War of 1899-1901 will recognise that name.
Jan Smuts was a commander of Boer forces fighting against the British forces, including Australians. Now, a decade and a bit later, he was in command of British forces in the area, including Australians. It’s a funny old world isn’t it?
Anyway, Smuts had devised a strategy for East Africa and that plan needed increased naval cooperation, not a decrease, and so rather than heading home Pioneer returned to patrol duties in the southern patrol area.
She rendezvoused with Hyacinth and the flagship Vengeance on 22 March 1916 off the coast of Dar-es-salaam, the capital of German East Africa. There was a German hospital ship named Tabora which had been operating in the area. She was suspected of doing very little in the way of hospital work and may have been up to more nefarious doings. She was ordered to allow an inspection party to board her and establish exactly what she was up to. Her Captain refused.
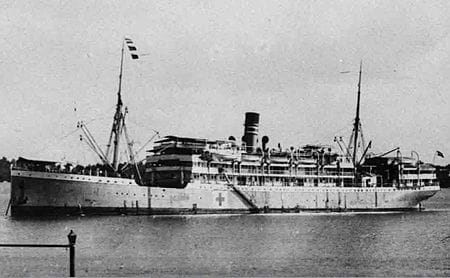
Pioneer, was ordered to close in and open fire if they saw any of the ships in the harbour moving in anything resembling a suspicious manner. She fired several warning rounds towards Tabora before the Vengeance ordered her to cease fire. A signal was sent to the Germans ordering them to evacuate all hospital patients or she would be sunk. After what was deemed to be a reasonable timeframe, no response had been received and no movement detected, and so all three ships opened fire and the Tabora was sunk.
Pioneer continued her blockade duties throughout June and July, generally monitoring the shipping in the area and making sure nothing was being smuggled through. Much the same as our more recent naval operations in the Middle East. Nothing really changes does it.
She did bombard emplacements when necessary and her last action was in July. After this time, the German forces in East Africa had been driven further inland. This meant that supplying that force by sea would no longer be practicable and so the naval blockade wound down. Pioneer left the theatre on 22 August 1916 and headed home to Australia, arriving in Sydney on 22 October.
Strangely enough, this obsolete ship, initially deemed fit only for training purposes and sent to German East Africa basically because the RAN had no better options to send, actually did more fighting and fired more rounds than any other Australian ship in World War 1. She was scuttled off Sydney on 19 February 1931.
And so that brings us to the main operations of the RAN during the war, and that’s their work in the waters around Britain and the North Sea. Now I’ve just said the HMAS Pioneer did more fighting and fired more rounds than any other ship. So how could she have done that if the main RAN ships were in the eye of the storm, so to speak? Surely the navy patrolling the same seas in which the German High Seas fleet operated would’ve seen more fighting that a little tub off the coast of Africa.
Well, it was a combination of the type of work and bad or good timing depending which way you want to look at it.
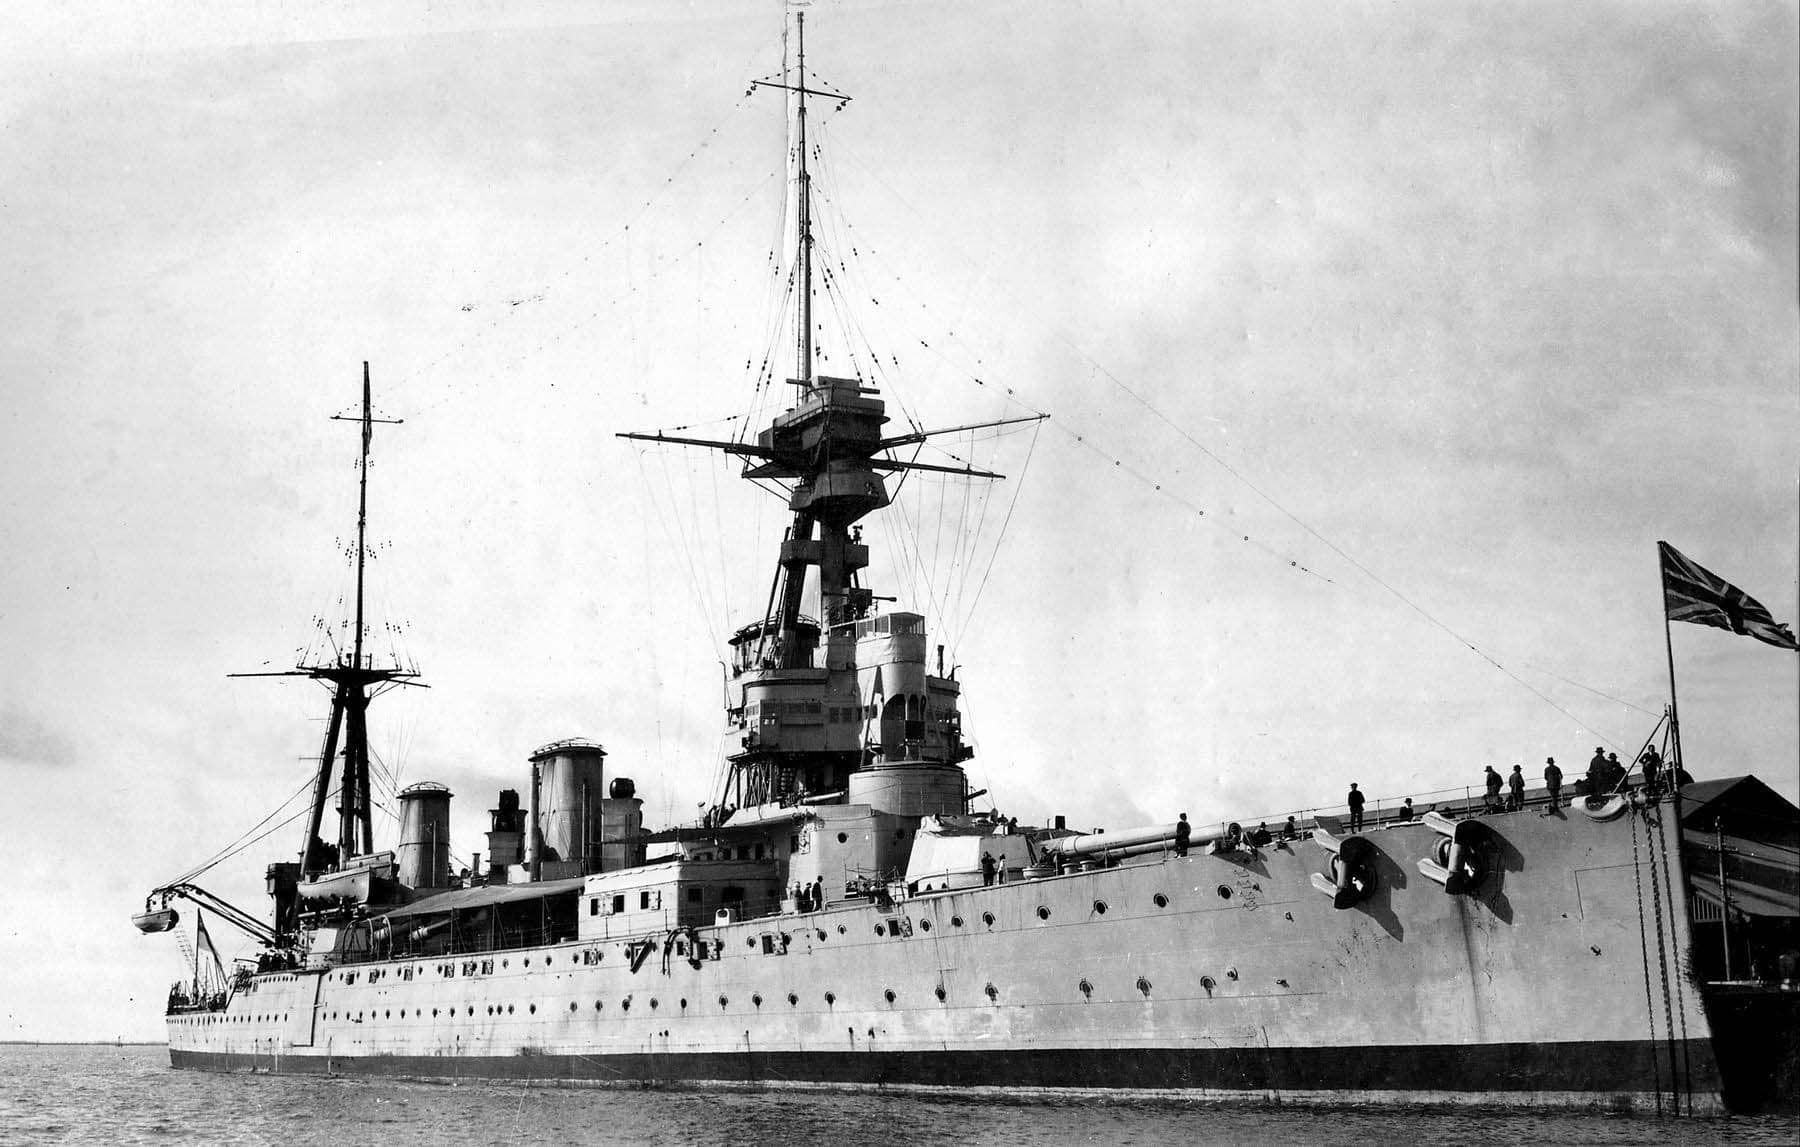
HMAS Australia, Melbourne and Sydney comprised our contribution to the blockade of Germany and escorting of Allied merchant shipping with the 2nd Battle Squadron. They each converged on England after completing their various tasks around the Pacific. HMAS Australia was appointed flagship of the Battle Squadron which included the 2nd Light Cruiser Squadron, which is where Sydney and Melbourne ended up.
Australia was ordered to sail for England in December 1914. On her way, off the coast of South America, she managed to capture and sink the Eleonore Woermann, Von Spee’s supply ship, seriously curtailing his activities in the region.
She arrived in Devonport on 28 January 1915 and from there was sent for Rosyth in Bonnie Scotland. It was at this point she was appointed the flagship of the 2nd Battle Cruiser Squadron, flying the flag of Rear Admiral Sir William Pakenham, KCB, MVO. Joining her at this stage of the war were her two sister ships HMS New Zealand and HMS Indefatigable.

Based at Rosyth, the Australia struck out into the North Sea with the Battle Cruiser Fleet, patrolling, escorting and generally just providing a presence throughout the region, helping to dissuade the German High Seas Fleet from coming out to play. There was much excitement on the 30 December 1917 when a suspected submarine sighting prompted her to fire a shot. A single, solitary shot. Her only one during her time in European waters.
This would tend to give the impression that there wasn’t much to this whole naval warfare gig in World War 1, but it did come with its own dangers. While sailing in thick fog on 22 April 1916 she collided with the New Zealand, putting her out of action until 9 June 1916 while she was laid up for repairs. Those of you who may know a bit about naval action in World War 1 will know that the only major engagement between the British and German Fleets throughout the war was the Battle of Jutland. And you may also know that the Battle of Jutland took place over 31st May to 1st June 1916. Which means that while the most important naval action of the war was being waged, HMAS Australia was in dock being repaired.
You can only imagine how her crew felt knowing that they were twiddling their thumbs while the very thing they had travelled all this way for was happening without them. But then again, it may not have been a bad thing.
Australia’s place as flagship of the 2nd Battle Cruiser Squadron was taken by none other than New Zealand who obviously had come out of their little encounter much better. How embarrassing. Now I know this is the Australian Military History Podcast and I’ve just finished saying there were no Australian ships involved at Jutland, but the Kiwi’s are almost Australian, which I’m sure they’ll be happy to admit to”¦”¦”¦and I’ll probably not have any other opportunity to talk about the only major naval action of the war, so I’ll take this opportunity to give a brief overview of the Battle of Jutland. And for the purists out there, this is going to be brief overview and I’ll admit upfront that it was a lot more technical than what I’m about to impart.
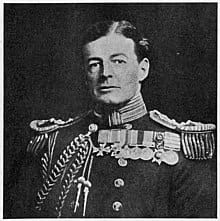
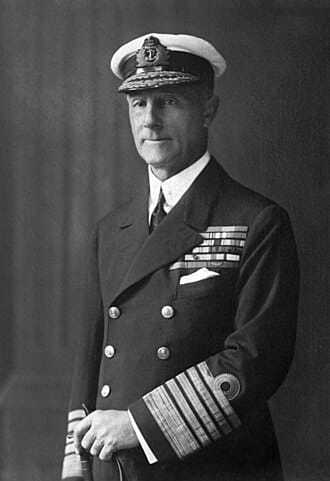
At the time, the British navy in the area could be divided into two groups. The Battlecruiser Squadron, of which the Australia would’ve been part of if it weren’t getting fixed, under the overall command of Admiral Sir David Beatty. The other was the Grand Fleet under Admiral Sir John Jellicoe.
For most of the war, the German High Seas fleet had been bottled up in port, nicely contained by the British blockade. Obviously German pride couldn’t allow this to continue, so they said ‘bugger to zis” and decided to do something about it.
Their rough plan was to lure Beatty’s Battlecruisers out from the haven at Scapa Flow up in the Orkney Islands, and basically give them a damn good thrashing before Jellicoe’s Grand Fleet could join in. Numerical superiority would be the key to German plans. They were confident they could overwhelm Beatty and then burn rubber, or water or whatever the appropriate nautical equivalent was, and get home safely. After which they’d re-arm and repair and be in good condition to have a crack at Jellicoe at a later point.
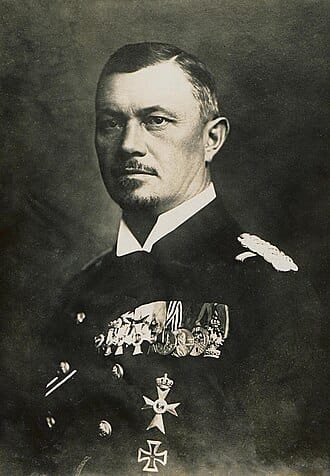
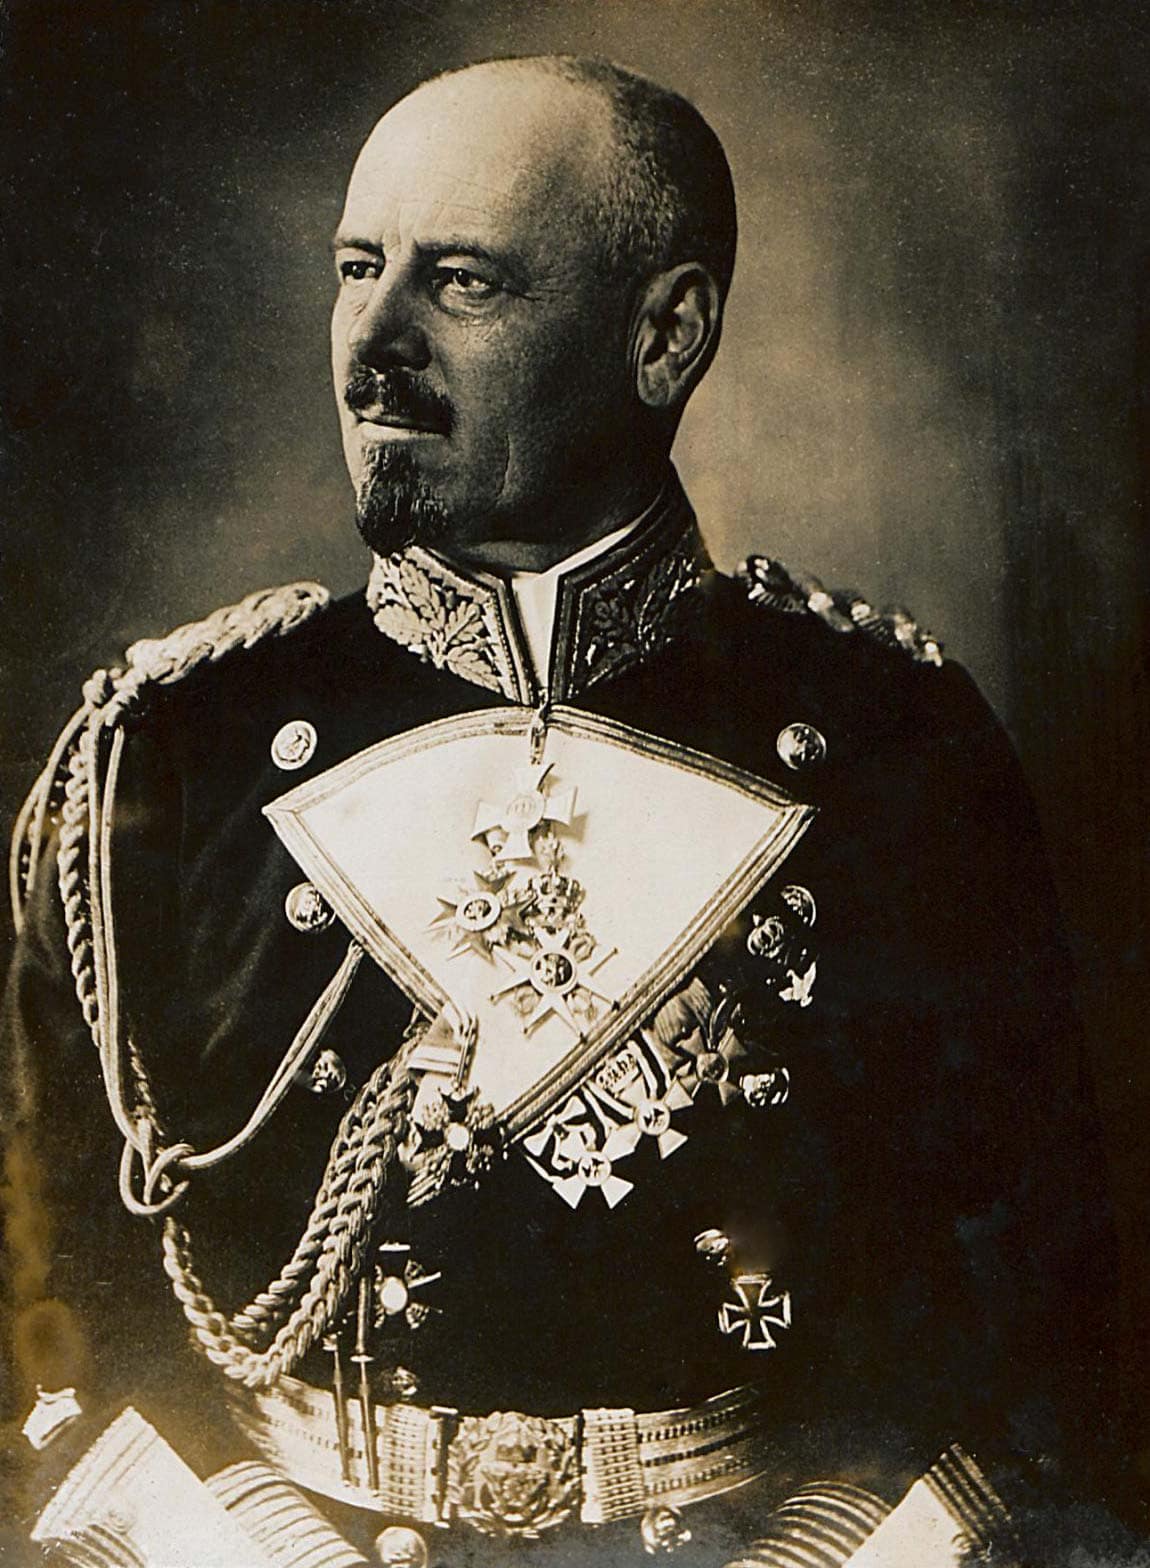
But all that is academic because the British codebreakers made sure the Admiralty knew exactly what was planned. Admiral Reinhard Scheer led the German High Seas Fleet out into the North Sea, safe in the knowledge that Jellicoe was nowhere near the proposed scene of the action.
To lure the English out, the Germans bombarded the English towns of Lowestoft and Great Yarmouth on 25th April. So far so good for the Germans. Jellicoe sent part of the Grand Fleet to join Beatty’s Battlecruisers in pursuit of the attackers, unaware that the main part of the High Seas Fleet was hanging about off the Norwegian Coast waiting to pounce. Scheer sent a message to his fleet to put to sea and attack Beatty. It was this message which was intercepted letting Jellicoe know what was going on.
What Jellicoe or Beatty didn’t know was exactly where the Germans were planning to spring their trap. Both the Battlecruiser Squadron and the Grand Fleet began a sweep of the area looking for the German Fleet but found nothing. Beatty began to turn for home, believing the Germans had given him the slip. Jellico, about 65 miles away also decided to give up the chase.
Both Admirals were unaware that the High Seas Fleet was steaming straight for Beatty. Strangely enough Scheer was also unaware of this. So basically, you’ve got three fleets of warships sailing about, totally unaware they were about to be involved in the major naval engagement of the war. It was only when Scheer saw the smoke of a Danish steamer and sent a couple of ships to investigate that things got interesting, because Beatty had also seen the smoke from the steamer and sent two of his ships to go have a look. Guess what happened next?
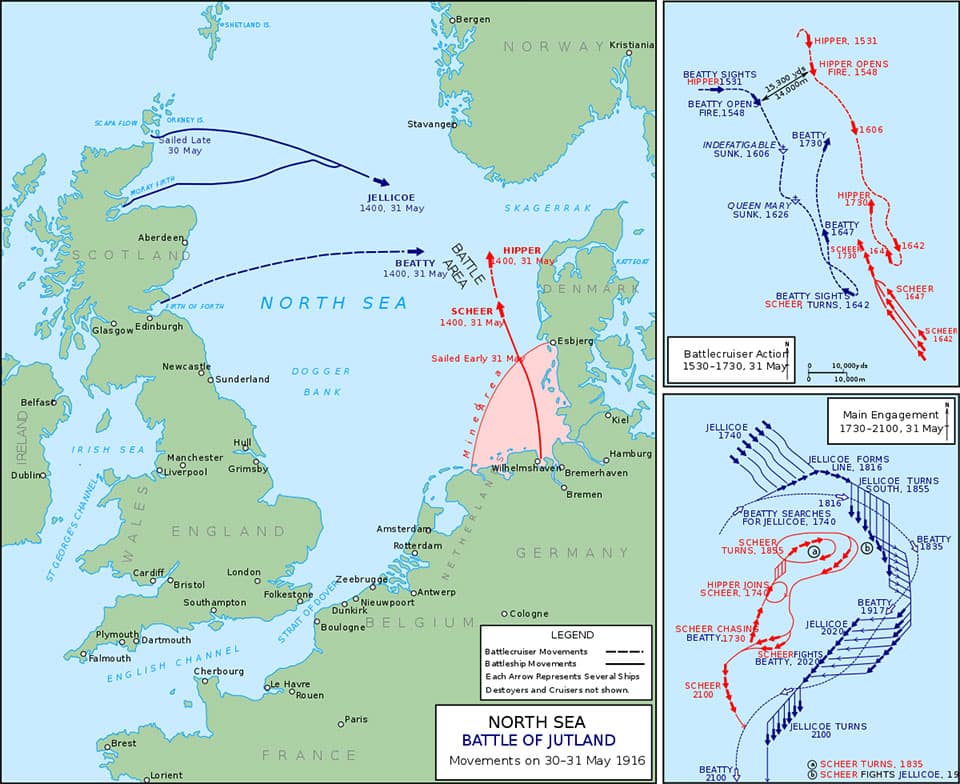
The two German and two British ships saw each other and signalled that fact back to their respective flagships. At 2:28pm on 31 May the HMS Galatea fired the first shot of the Battle of Jutland. From here it was on for young and old. Beatty and his German counterpart von Hipper sailed their fleets to the scene.
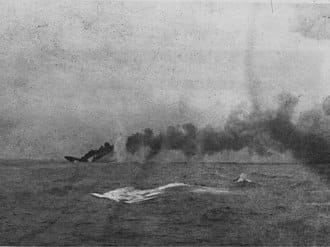
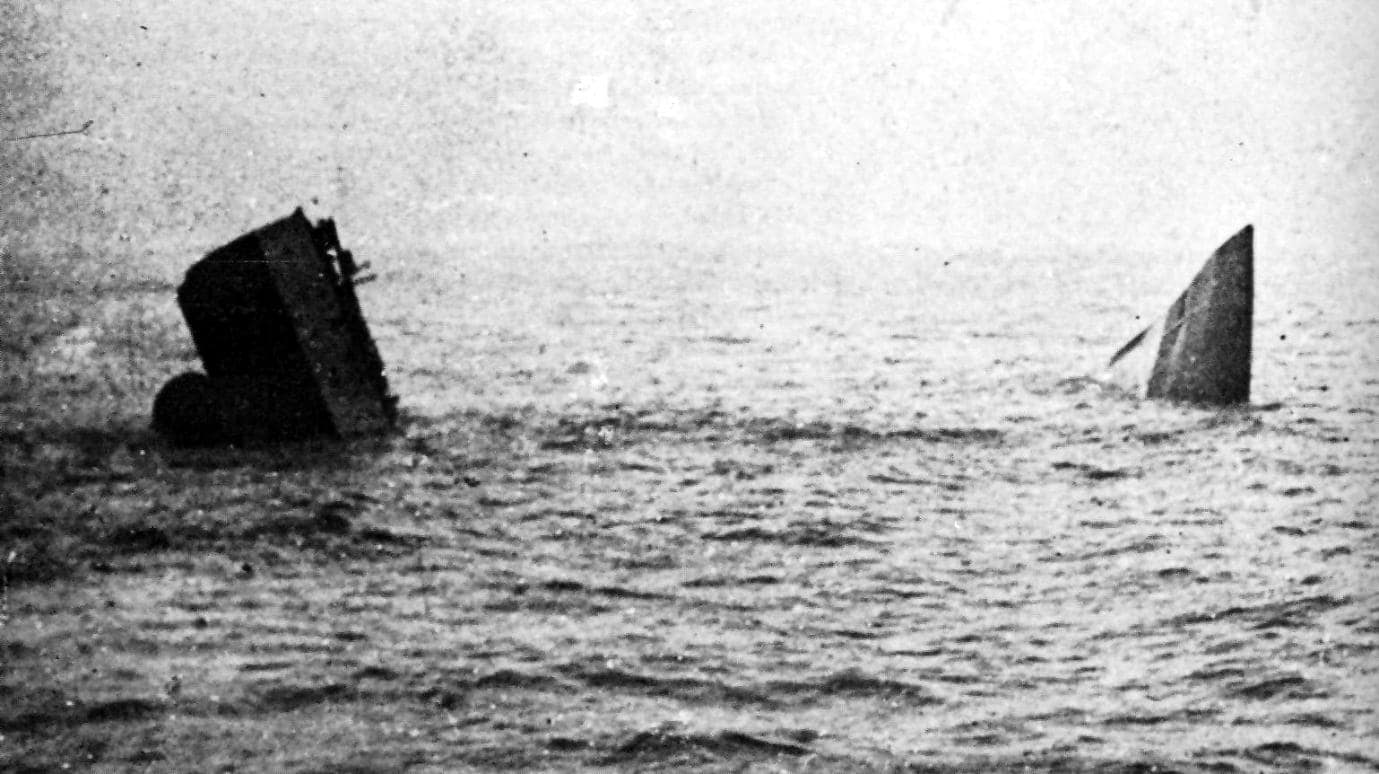
The first hour or so was a confused and hectic fight. In a 20-minute period the British ships Lion, Princess Royal and Tiger were hit and severely damaged. Indefatigable was caught by two salvoes and capsized and sank. Hippers’ battle cruisers also sustained heavy damage. But the biggest shock was the Queen Mary. In the middle of the fight a massive explosion rang out and a huge fireball erupted from inside the ship. The main magazine had been hit and the resulting explosion tore the ship apart.
Just to the south of Beatty’s force Commodore Goodenough reported the main body of the High Seas Fleet. Beatty began to withdraw his forces northward, hoping to lure the Germans towards Jellicoe’s Grand Fleet, 40 miles away. It took some fancy manoeuvring by Jellicoe to get his fleet into battle formation but by 6pm, with light fading he was in position to attack the leading ships of the German fleet. Jellicoe could unleash the fire of his entire line, while only the leading German ships could return the fire, the classic ‘crossing the T’.
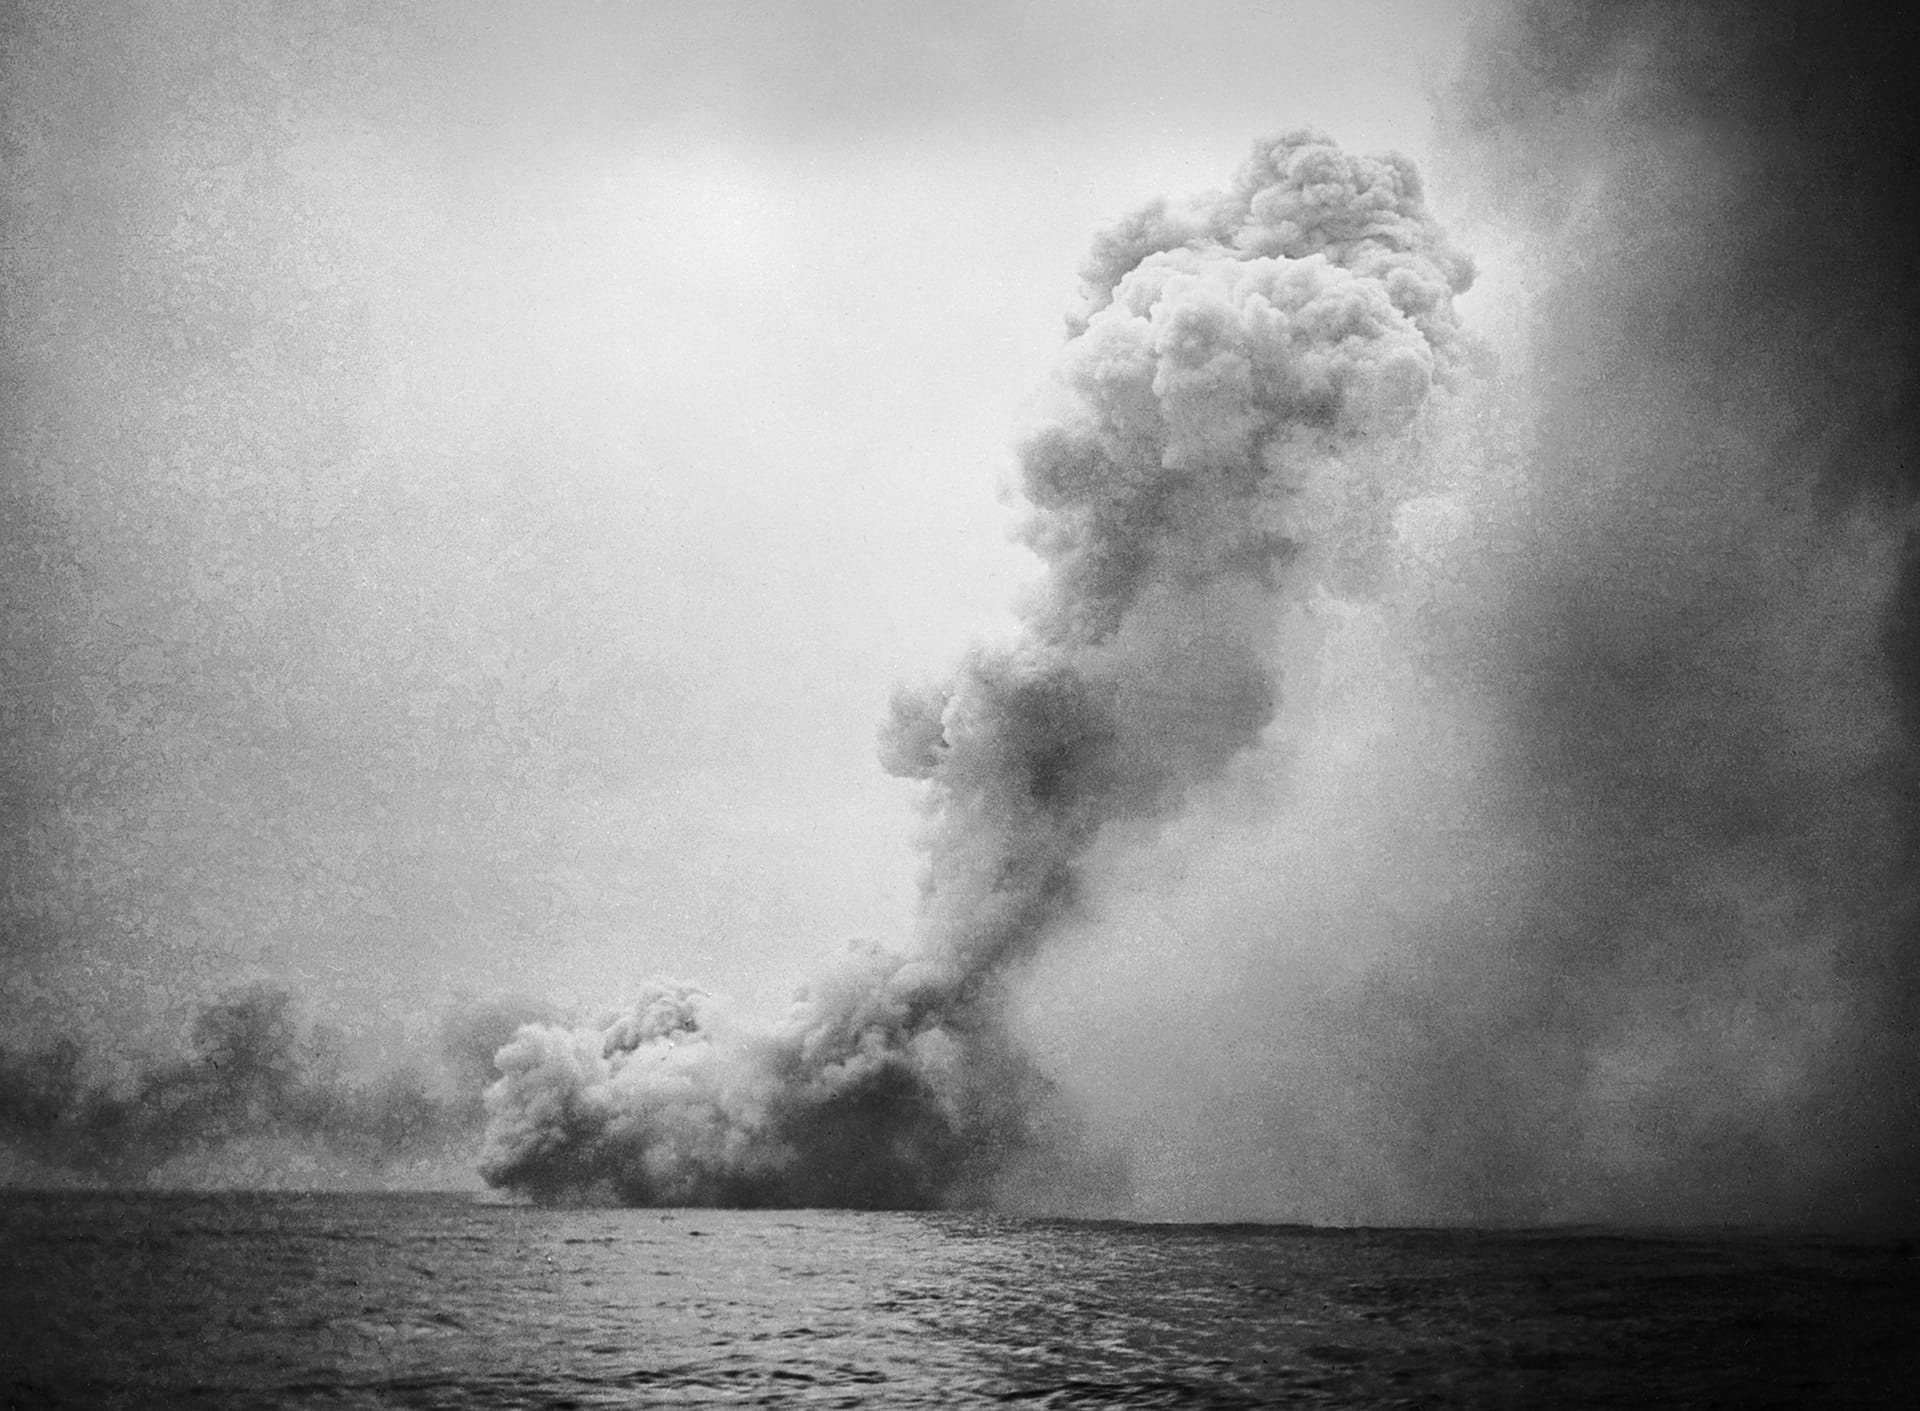
This would normally spell almost immediate disaster for the fleet being crossed, but the German ships were remarkably well constructed. Better than the British ships and so they didn’t suffer as much as they might have. Three German vessels managed to fire broadsides at the British and scored direct hits on Invincible which, like the Queen Mary, was destroyed as the magazine exploded. Only six of her crew survived.
Scheer, though, knew they’d lost the initiative. They were outnumbered now that Jellicoe had arrived and so he ordered his line to retire. Basically, to turn 180 degrees, under cover of a smoke screen and high tail it out of there. But this didn’t improve his position any because the Grand Fleet was between him and his home port, so he ordered another 180, hoping he would be able to bypass the British line. He didn’t and he came under heavy fire. Again he had to turn. In order to divert British attention, he ordered his battle cruisers and torpedo boats to basically sacrifice themselves in a charge at the British fleet, in the hope the main fleet could then escape.
This worked, in a manner of speaking, as Jellicoe overestimated the threat and ordered his Fleet to turn away. Scheer was able to escape and that was more or less the end of it. Both sides claimed victory, but it was basically a draw. The British lost more ships and men, being three battle cruisers, three cruisers and eight destroyers being sunk and the loss of 6 768 men, killed or wounded. The Germans lost one battleship, one battle cruiser, four light cruisers and five torpedo boats and 3 058 men killed and wounded.
The German ships had proven themselves to be of better construction to the British, especially when it came to protection of the magazine, as the Queen Mary and Invincible showed. Had Scheer managed to engage only Beatty at that time then he may well have succeeded. But Jellicoe’s arrival meant the numbers were against him. The British may have suffered greater losses, but they could more easily absorb those losses and continue fighting on if the Germans so desired it. But the German’s knew another battle of that scale would see their Fleet destroyed. They suffered fewer losses but were unable to sustain even those. Rather than take the risk, they scurried back to their home ports and never ventured forth again for the remainder of the war.
So that’s Jutland. It’s only relevance to Australian history is the fact that the result of the Battle would determine the role the Australian ships would undertake for the rest of the war.
So, in June 1916, all patched up after her close encounter, HMAS Australia was back at sea, patrolling and escorting, patrolling and escorting and for something completely different, patrolling and escorting. It was monotonous, tedious and mind-numbing, but also at all times there was the undercurrent of threat. U Boats were active in the area and any moment could see a torpedo heading towards you. And during the winter months the crew had to deal with heavy seas, storms, iced up decks and all be on constant lookout for ice bergs.
And so it went until 12 November 1917 when Australia sustained damage in a violent, courageous confrontation with enemy shipping. Just kidding, she collied with another of her own fleet. This time it was HMS Repulse, which obviously didn’t live up to its name, and Australia was out of action for three weeks while being patched up again.
The boring, routine nature of the work more than likely played a role in one officer and ten ratings from Australia volunteering for special service in when the call went out for volunteers in February of 1918.
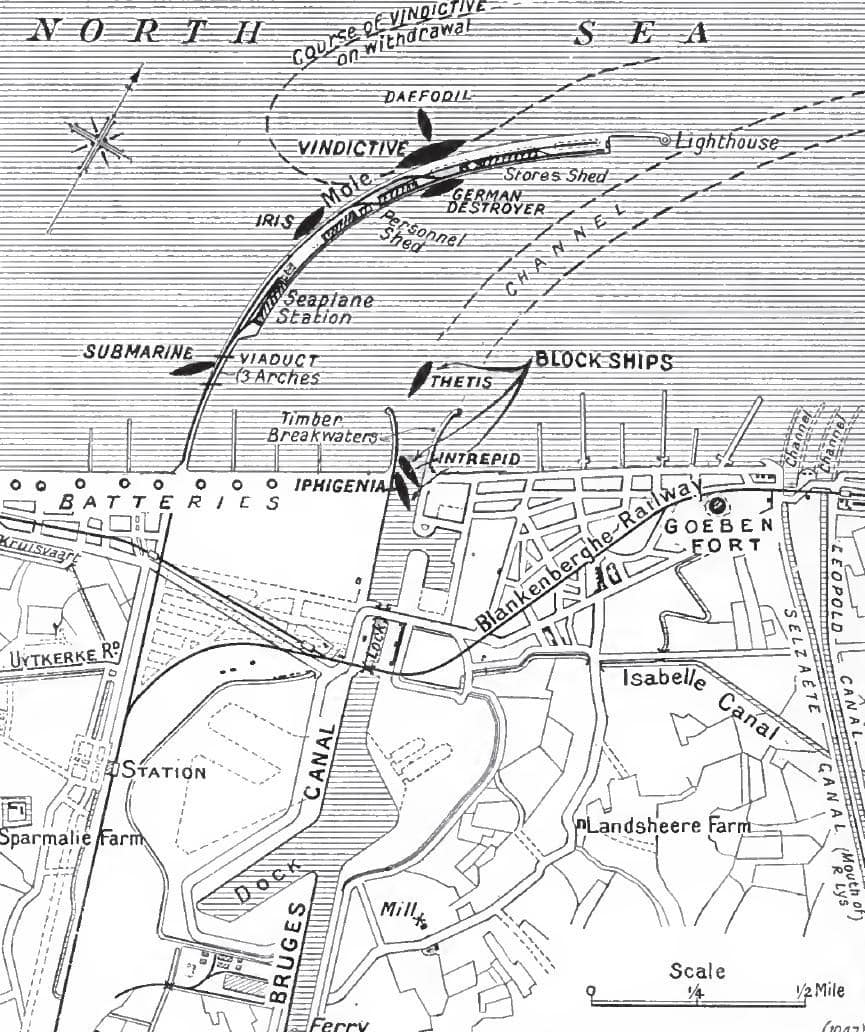
The Belgian ports of Ostend and Zeebrugge had been used by the Germans as a base for its U-Boats and Destroyers. The Admiralty weren’t real happy about this and so a plan was launched whereby three obsolete cruisers would steam into the harbour and then be sunk in the Zeebrugge Canal, thereby putting a pretty effective block across it. Sounds simple.
But. There’s always a but.
At the entrance to the canal there was a breakwater, known as the mole. Upon the mole, the Germans had mounted numerous artillery pieces and machine guns. Obviously these would make it difficult to just send three ships into the harbour, so the mole had to be taken first. Therein lay hard part. To take the mole, troops would have to somehow be put ashore, while under fire from the very artillery and machine guns they were hoping to silence.
I bet they didn’t tell them that when the call for volunteers went out.
The members of Australia’s crew selected from the dozens of volunteers were, Artificer Engineer (Warrant Officer) William Edgar, Leading Stoker William Bourke, Leading Stoker Reginald Hopkins, Leading Stoker Godfrey Lockard, Leading Stoker James Strong, Stoker Norbert McCrory, Leading Seaman George Bush, Leading Seaman Dalmorton Rudd, Able Seaman George Staples, Able Seaman Henry Gillard, and Able Seaman Leopold Newland.
All up 82 officers and 1698 men signed on for the duty from across the Royal Navy. They were given two months of intensive training in trench warfare, assault tactics, bomb throwing, bayonet drill and the use of mortars and Lewis machine gunning. Others were given specialist training in demolition. The keen eyed among you will recognise what was being formed here. It was the basis of what, in World War 2, would become known as a Commando force. The volunteers were divided into groups of 200 and each group was assigned a specific task.
All up there were one hundred and sixty-five vessels involved in the raid, but from the Australians perspective, Artificer Edgar was on the HMS Iris, the five seamen on HMS Vindictive and the five stokers to HMS Thetis, which was to be one of the three blocking ships.
The first two attempts to launch were abandoned due to bad weather, but on 22 April it was all good and so the flotilla upped anchor and set off. By 10:00pm the ships had rendezvoused off the coast. The hands who had been required to sail the blocking vessels to that point were removed onto other vessels, leaving only the bare minimum on board for the final bit. At 11:10pm the British bombardment of the Belgium Coast commenced and 20 minutes later was directed towards Zeebrugge. While the bombardment was underway, motorboats whizzed around the area laying a smoke screen which soon ran to about eight miles long, running parallel to the coast.
To attract the attention of the defenders, two other groups of motorboats attacked the western end of the mole, while Vindictive made her approach. Vindictive’s role was to lay alongside the mole and disgorge her landing party. Just before midnight she emerged from the smokescreen on her approach run. The German’s turned the machine guns on her and inflicted heavy casualties among the men on the deck waiting to go over. Most of the landing party’s officers were killed or wounded.
The tidal movement also caused her some trouble and she struggled to sit against the mole. The Daffodil, normally employed as a ferry, noticed the trouble Vindictive was having and in an amazing bit of seamanship pulled alongside Vindictive and gently pushed her alongside the mole.
Gangplanks were laid from Vindictive onto the mole and the first of the landing parties, including the five Australians, charged up the gangplanks and began their assault. A few minutes later, Iris also came alongside, just ahead of Vindictive and unloaded her assault troops.
Then things began to unravel.
The initial plan had been to storm ashore and take out the head battery, clearing the way for the blocking ships to come in unhindered. But, Vindictive had landed a bit beyond her intended point and there were now German machine guns and barbed wire between them and the battery. They obviously weren’t going to get through all that and so their mission changed to just holding the ground and drawing the enemy fire as a diversion. And draw the fire they did, with just about every German gun on the mole turned in their direction.
While all that was going on, an old British submarine, HMS C3, slipped into the harbour. She had been packed with tons of high explosive, and her mission was to lay up beside the railway viaduct which connected the mole to the shore and then set the timers to blow up after the crew had abandoned ship. Not wanting to risk the sub floating away from the viaduct after his crew jumped, her Captain, Lieutenant Sandford rammed the viaduct and wedged the sub in between the steel girders. She wasn’t going anywhere. The crew jumped into a small skiff while Germans poured fire in their general direction. The explosion went off as planned, blowing away 100 feet of the viaduct and cutting communications between the mole and the shore.
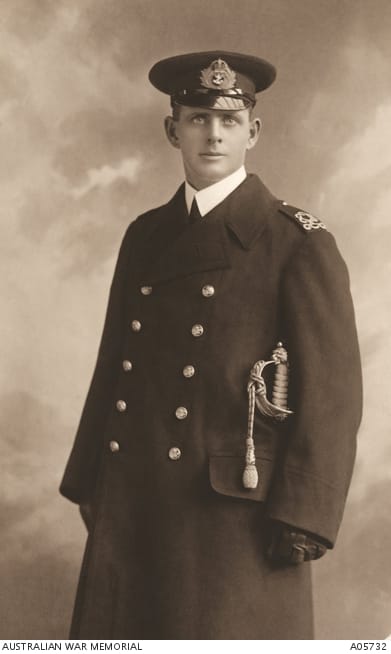
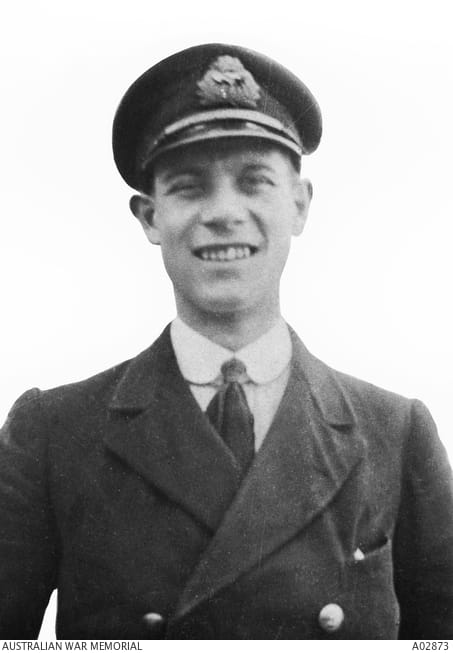
Lieutenant John Howell-Price was second in command of the C3. He was born in Australia but was serving with the British naval reserves when he volunteered for the raid. He was awarded a Distinguished Service Order for his bravery at Zeebrugge.
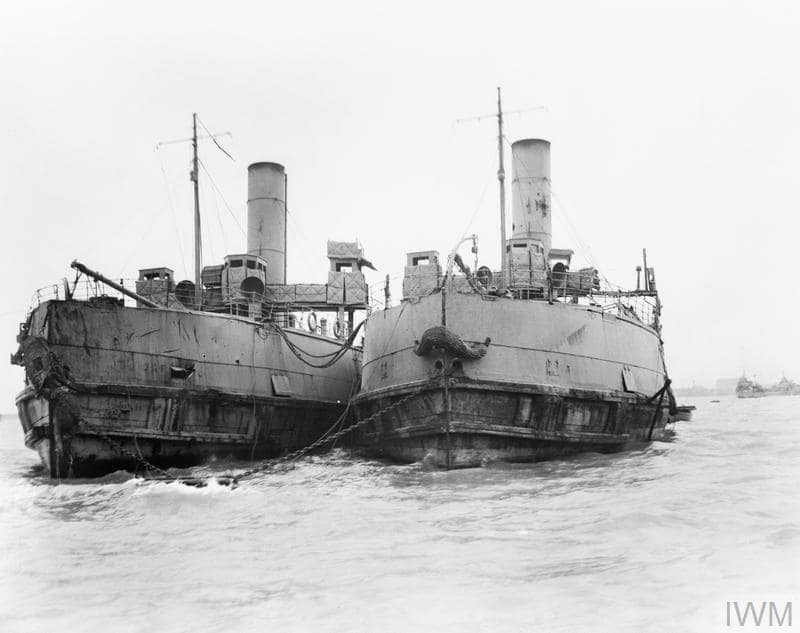
Just as the viaduct was heading skyward, the three blocking ships, the whole focus of this stunt, approached the channel. The lead ship Thetis took heavy fire and was taking on water and was halted about 500 metres short of her objective, but in the process she’d cleared the obstacles for the other two ships to follow. Intrepid got into the channel and turned side on before scuttling. Iphigenia followed close behind and turned to the other side of the channel and was also successfully scuttled. Most of the crew from both ships jumped into cutters and skiffs and rowed back out of the harbour where they were picked up by motorboats.
So now the job was as done as it was going to get and the recall was sounded, which must’ve been a relief to those men from the Vindictive and Iris still battling it out on the mole. Under extreme fire they withdrew to the ships, carrying their wounded with them. The ships had been subject to devastating fire during their time alongside. Vindictive had much of her control tower and guns blown away and it was a minor miracle that she could still get away under her own steam.
Iris took more fire while withdrawing and her Commanding Officer was killed. She was on fire as she followed Vindictive back into open water and out of range of the guns.
The raid could best be described as a partial success. The harbour and canal were blocked for a few weeks, but the Germans dredged the channel around the block ships and submarines were soon able to work their way through. The raid had cost 214 British killed, 383 wounded and 16 prisoners. The Awards list for this relatively brief event speaks volumes for the ferocity of the fight. 11 Victoria Crosses, 31 Distinguished Service Orders, 40 Distinguished Service Crosses, 16 Conspicuous Gallantry Medals and 143 Distinguished Service Medals were awarded.
Of the VC which were awarded, four were awarded by ballot. Basically one man would receive the award on behalf of their unit. Seven of the Australians received medals for the part in the operation. Despite being in the thick of the action, no Australians were hit.
HMAS Australia’s other World War 1 claim to fame is its role at the forefront of a new, game changing method of waging war at sea which would come to dominate naval operations in the next war. The aircraft carrier. Now I know that immediately calls to mind images of a ship with a large deck for taking off and landing, rows of fighter craft lined up ready for immediate call to action.
Well nup.
The reason Australia was chosen for a role in sea based aerial warfare was due to the position of her echelon gun turrets, being higher off the deck giving better exposure to the wind than other ships. ‘Her gun turrets, what’s that got to do with anything.’ I hear you ask. Well, the Australia was a battleship, it didn’t have a long uninterrupted bit of flat deck from which to launch. No warship of the time did. But when contemplating the possibility for ship-based planes, some bight spark noticed that the gun barrels were designed to be elevated. If they could put a bit of planking across the barrels, then elevate, that would create a fair to reasonable ramp. But would it be long enough for a plane to take off?
On 7th March 1918, with what I assume to be the pilot who drew the short straw, they had a crack at it. And to everyone’s relief, particularly the pilot, it worked. A Sopwith 1 ½ Strutter was successfully launched, being the first ever two-seater aircraft to be launched from a naval vessel. Later, on the 4th April, she was also the first ever to launch a fully loaded plane for operational purposes. By the end of the war several successful launches had been carried out without incident. A new era had arrived.
With the war over Australia finally sailed for home on 23 April 1919 arriving in Fremantle on 28 May.
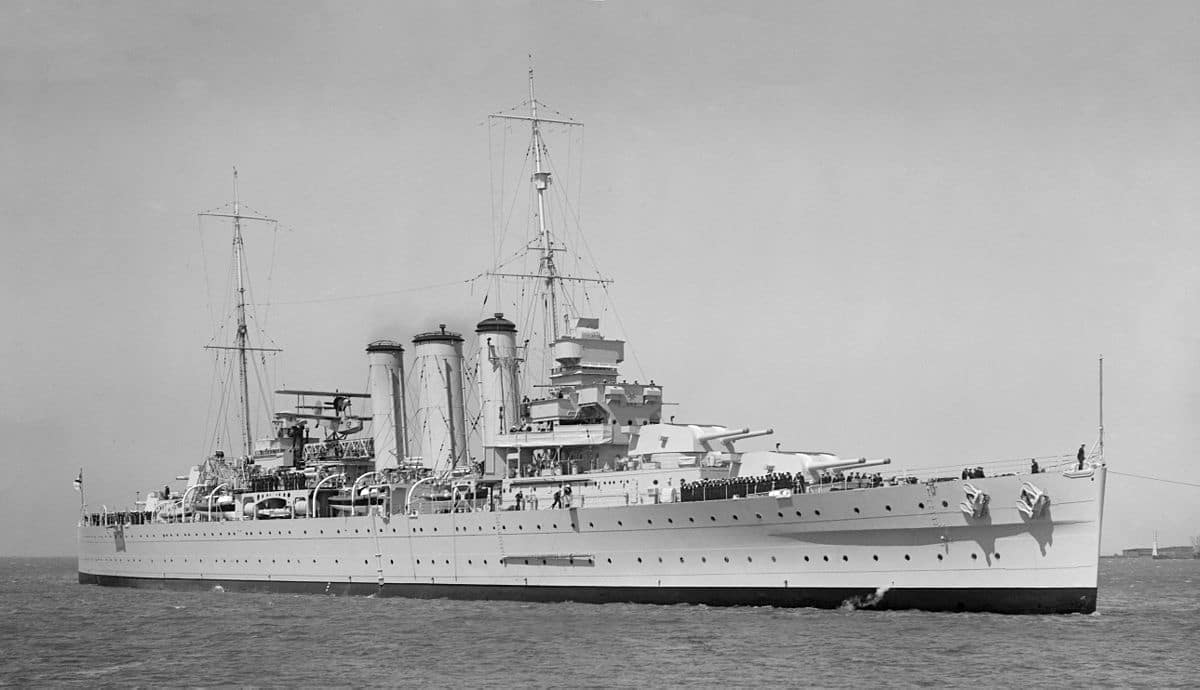
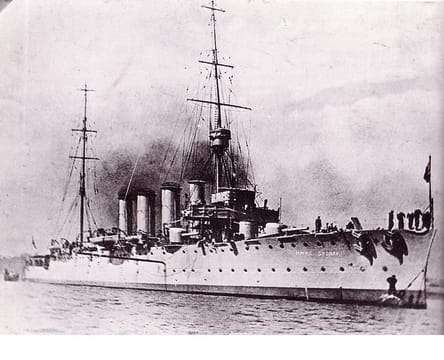
HMAS Sydney arrived in Devonport on 19 September 1916 after her tour of Bermuda. She was immediately sent for a refit after which she spent a brief period attached to the 5th Battle Squadron before sailing for Rosyth to join the 2nd Light Cruiser Squadron. Like the Australia her war consisted mostly of North Sea patrolling and escort work.
She did get to fire her guns in anger though. On 4 May 1917, she was patrolling the Humber estuary when up in the sky emerged the unmistakable shape of a Zeppelin. The L43 to be exact. A battle soon ensued, and by the end the Sydney had fired off all her anti-aircraft ammunition, the L43 had dropped all her bombs and the worst that happened to either one was some shell splinters on Sydney’s upper deck. Sydney and L43 were said to have ‘parted on good terms.’
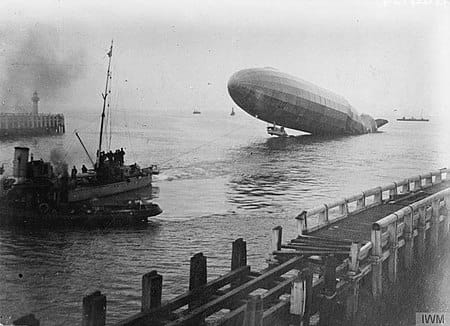
You can imagine the crews of both combatants as it must’ve dawned on them that the whole fight was farcical, but neither could just give up. By the end they were probably laughing at the futility as the last shells were loaded into Sydney’s guns and the lost bomb sent on its way from L43. War can have its lighter moments sometimes.
In August 1917 she was out of action for a refit. During this refit she was fitted with the first ever revolving aircraft launching platform to be installed on a naval vessel. HMAS Australia may have launched the first two seater aircraft and the first fully loaded operational plane, but Sydney was the first to successfully launch any kind of aircraft. Like the Australia’s launch platform it was constructed for use on the top of a gun turret. But Australia’s was pretty much in a fixed position. Sydney’s platform was fitted to a rotating turret, meaning the platform could be turned into the wind while the ship maintained its normal heading.
In early 1918 Sydney took on board a Sopwith Camel, the standard British fighter plane by that stage of the war. On 1 June 1918, Sydney was patrolling enemy controlled waters when two German seaplanes were seen heading towards HMAS Melbourne. The planes dropped some bombs in the general vicinity of Melbourne but did no damage. Lieutenant AC Sharwood of the Royal Airforce, jumped into Sydney’s Sopwith, with the launch turret turned 20 degrees off the centreline. This meant Sharwood was able to get into the air before Melbourne’s pilot, Flight Lieutenant Gibson, as Melbourne need to change course into the wind for take-off.
Gibson climbed into the cloud but failed to locate the enemy and so he reduced altitude and circled around the fleet as protection in case the Germans returned. But the reason he wasn’t able to find the Germans was because they were beating a hasty retreat with Sharwood hot on their tails. It took him 60 miles to catch up, but when he did, he dived on one of the aircraft, firing his machine guns. His logbook records him chasing three aircraft, two 2 seaters and one single seater, although the official account only records two. His attack was aimed at the single seater which he saw shudder and dive into the sea. As he followed it down to confirm the kill he was engaged by one of the other enemy plans. During that fight, his guns jammed and so he broke away from the fight.
But now, he was 70 miles away from the Sydney and had a decision to make. He was in enemy territory, without sufficient fuel to get back. Luckily for him, he saw the HMS Sharpshooter on the water below him and so he ditched nearby and was picked up and returned to the Sydney. HMS Canterbury later picked up his plane. The Admiralty didn’t recognise the shooting down of the German aircraft because there were no corroborating accounts and for the same reason, he didn’t receive any commendations for his courage in taking on 2 or 3 enemy aircraft.
At the end of the war, when the German High Seas Fleet was surrendered at Scapa Flow, Sydney was assigned as the escort of a German vessel named Emden, the ship carrying the name of the vessel which the Sydney had engaged all those years ago while escorting the first convoy to war. She eventually left Portsmouth and headed for home on 9 April 1919, but her arrival in the city for which she was named, on 18 July 1919, almost went unnoticed. After more than four years away she sailed into the harbour and wasn’t noticed until ferry passengers on their way to work the next morning noticed her tied up at her dock. Not that the crew minded, they were home and that was all that mattered.
So that leaves one more vessel of note, the HMAS Melbourne. And much like the city she was named after, her residents thought she was all but indispensable, but no one else really cared. My apologies to my readers in Melbourne”¦”¦but you know it’s true.
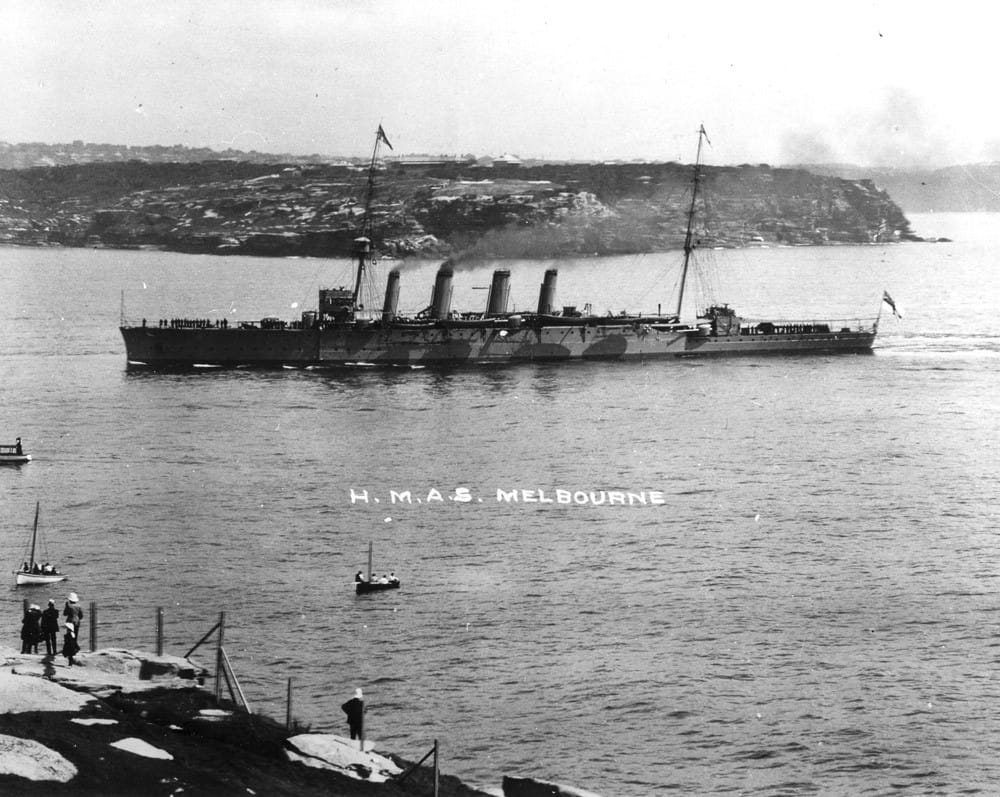
Anyway, in August 1916 Melbourne’s tour of North America and the West Indies came to a close and she sailed forth to Devonport, arriving on 7 September. She then went to join the 2nd Light Cruiser Squadron to serve with her sister ship Sydney.
She undertook routine patrol duty in the North Sea until January 1917, when serious engine trouble forced her to spend the next six months in dock. It wasn’t until 27 June 1917 that she again sailed to re-join her squadron at Scapa Flow. She continued to patrol the North Sea for the next 18 months but took part in no actions at sea and suffered no casualties.
Now I know this kind of sounds like she didn’t do anything important. But although she never fired a shot in anger at another ship, duelled with Zeppelins or had crew members volunteer for adventurous raids, she did perform a crucial role towards the successful outcome of the war. Simply by being a part of the naval blockade, providing a presence in those waters, she helped starve the Germans of the means to wage war. Her crew still spent many, many months away from home, they still battled the rough seas and still ran the risk of torpedo attack from German U Boats. And as such, they deserve a nod in recognition of their service.
And so that’s it. That is the role of the fledgeling RAN in World War 1. It was tireless, routine and mostly boring work for the crews involved, and the true contribution that these ships made to the story of Australia at arms wouldn’t be felt for another 20 years. But many of the men who served on these ships, would be promoted over the years and when Australian waters were again threatened, this core of experienced sailors would play pivotal roles in supporting Australian troops in the next war. They would see much more active fighting, and as a result suffer many more casualties. I’ll tell the stories of those ships in their own episodes, but for now, even this biased old soldier has to give a nod to the Royal Australian Navy 1914-1918.
Related stories: The RAN in WWI – Part 1; The RAN in WWI – Part 2.
Other military items by the author, Warwick O’Neill, can be found at: https://www.australianmilitaryhistorypodcast.com/
You can read more about the author, Warwick O’Neill, here.
