
When I mention World War I, what images come to mind? Mud, trenches, huge artillery explosions, lines of men going forward only to be mowed down by machine gun fire. Maybe you’ve expanded your vision a bit to include desert sands, Gaza and the Camel Corps.
But how about gale force winds, icebergs and sheer mind-numbing monotony. Probably not hey. But for a few thousand of Australia’s World War I servicemen, this was their war. An endless round of escort and blockading with the ever-present threat of a torpedo from underneath.
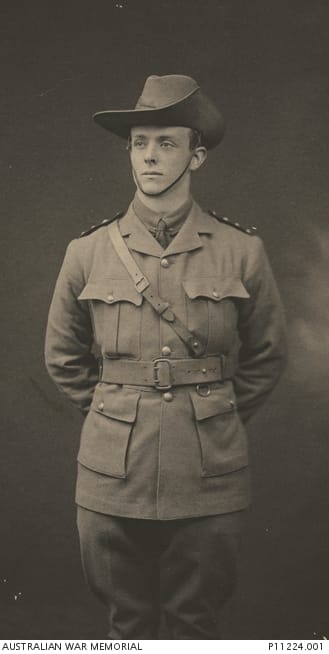
I am of course referring to those clean-cut young men from the Royal Australian Navy.
The role the Royal Australian Navy played in the Great War is often unsung. Unlike World War II, apart from a couple of exceptions, there were no real pivotal war defining battles such as Coral Sea or the Tobruk Ferry Service. They primarily escorted troopships from Australia to the various fronts and escorted those ships bringing wounded men back home. Or else they patrolled the waters of the North Sea as part of Britain’s blockade of the German High Seas Fleet.
Hardly the stuff for stirring patriotic fervour and the telling of exciting tales.
But it was vital work, under sometimes extreme conditions and probably deserves more praise than they’ve received over the last hundred years. So, to tip the balance a little and to give credit where credit is due, I’ll go through the various actions, both the exciting and the mundane and see what those lads got up to. I initially thought it would probably only take one article to tell this story, but it will end up taking three. In the first one we’ll cover the early operations over the first few months, ending up with Sydney’s encounter with Emden. The second episode will cover the RAN role at Gallipoli, which contained a couple of surprises, and the adventures of HMAS Psyche. And then in the third episode we’ll head to Europe and Africa for the war against Germany.
But before all of that, what was the state of the Navy at the outbreak of the war?
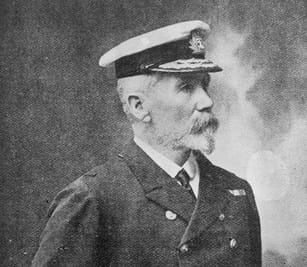
Well, for a large country completely surrounded by water and dependent upon that water for trade and security, the state of the navy can best be described as underwhelming. Right up until the early 1900’s we pretty much relied on the good old Royal Navy for our protection. A few insightful people reckoned that this wasn’t a great situation. One such person was Captain William Creswell, then Director of the Commonwealth Naval Forces. They demanded a stand-alone Australian navy, financed and directed by Australia, in Australia’s interests.
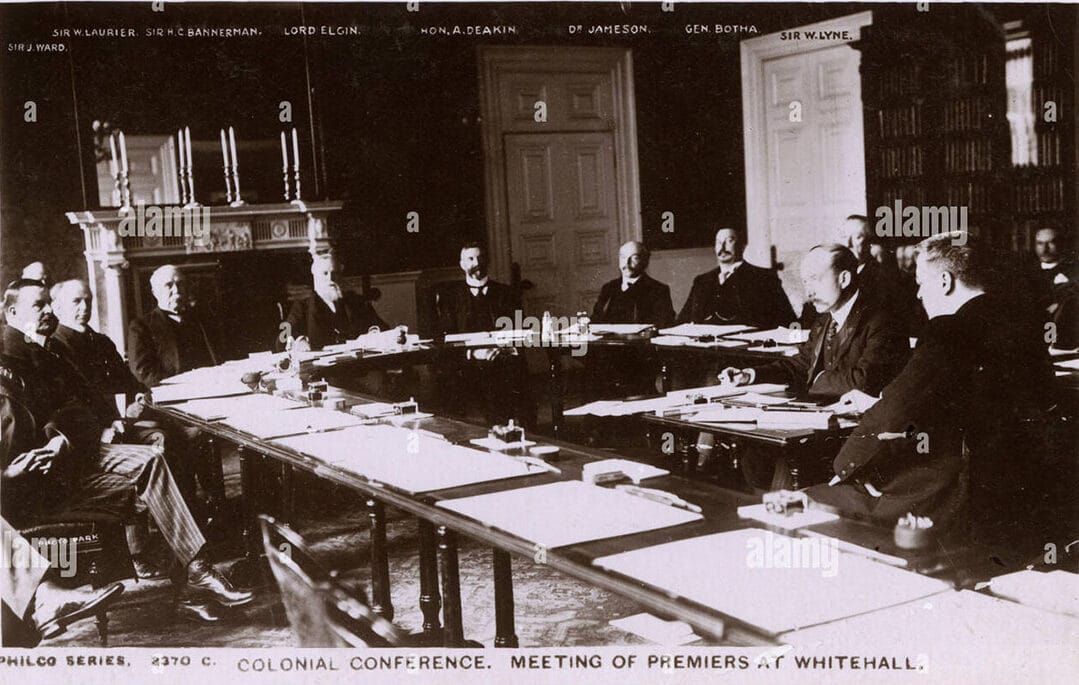
In 1907 Creswell and Prime Minister Alfred Deakin attended the Imperial Conference in London where they put the proposal of an Australian Navy to the British Admiralty. The Poms weren’t impressed. They didn’t want ships being under control of anyone but the Admiralty. Fancy Australia wanting a say in their own maritime defence. Good Lord the impertinence of such a suggestion.
So anyway, Creswell and Deakin returned to Australia without the British backing, but in what must’ve been quite the difficult decision, keeping in mind Australian’s still saw themselves as British, Deakin in 1908 invited the United States Great White Fleet to visit Australia. This served two purposes. First it fostered an enthusiasm for a modern navy among the Australian public. The site of these fine, imposing American ships got many Australians thinking ‘why don’t we have some of those.’

This attitude then made it easier for Deakin to authorise the purchase of two 700 ton River Class Torpedo Boat destroyers from the US. And so the deal was done. The Pommy Admiralty were quite appalled by this, but it showed a willingness for Australia to look elsewhere if the English wouldn’t play nicely. Maybe it wouldn’t be such a bad thing to allow those Colonials to have their own navy, so long as they purchase them from fine British shipyards, not the Yanks. And so they changed their position and in 1910 the Naval Defence Act was passed and the Australian Navy came into being.
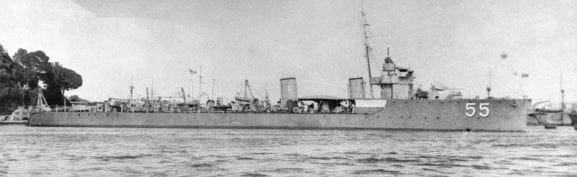
The first two destroyers of the navy, the HMS Parramatta and HMS Yarra were launched in Scotland in February and April 1910 respectively. They were commissioned into the Royal navy and sailed to Australia, arriving on 10 December 1910. On 10 July 1911, King George V, granted the Royal title to the navy which then became known as the Royal Australian Navy, and all ships within that Navy would carry the prefix ‘His Majesty’s Australian Ship’ or HMAS. Fortunately, the H part of the prefix didn’t have to change when Elizabeth took the throne, or more recently when Charlie took over the ‘reigns’ … Get it? Reigns/reins”¦. Anyway, I won’t give my thoughts on a foreign Monarch having technical ownership of our vessels, but you can probably guess.
Anyhoo, a couple of destroyers were not going to cut it when it comes to the defence of our 34 000 kilometres of coastline. Circa 1911, the Japanese navy was growing in strength. In the early 1900’s they’d given the Russian navy a belting during the Ruso Japanese war. Australia was nervous and so in the 1911 Imperial Conference it was agreed that the Royal Navy would work with the RAN to provide a blue water defence capacity.
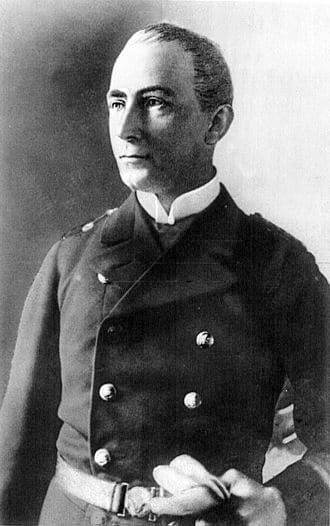
The British Admiralty had maintained what was known as the Australia Station until 1913 when they passed responsibility and nominal command of the station to the Royal Australian Navy, along with all the depots and dockyards and other naval structures. The first Commander of the RAN was Admiral George Patey. He was on loan from the Royal Navy, so not an Australian commander, but such was the way of things back then.
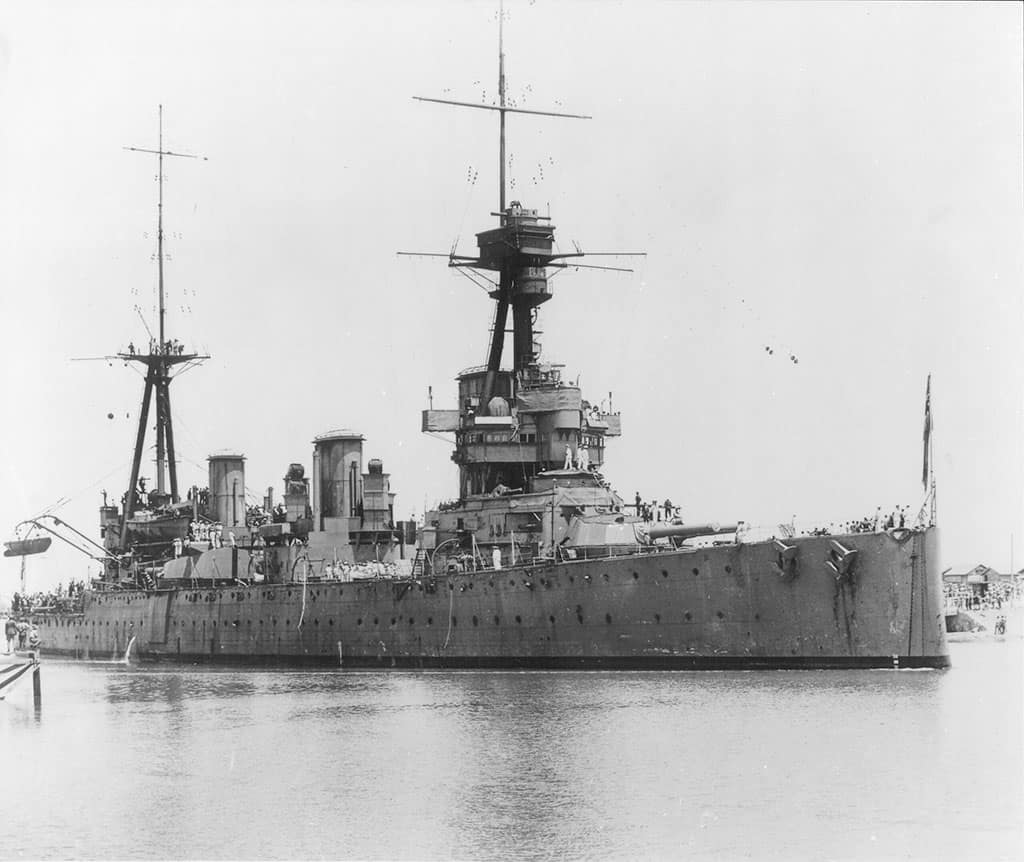
By the end of 1913 the Navy had grown to now include the battle cruiser Australia, the cruisers Melbourne and Sydney, the protected cruiser Encounter, and the torpedo-boat destroyers Parramatta, Yarra and Warrego. These ships were manned by four hundred officers and men.
At the outbreak of hostilities in August 1914 the small cruiser HMAS Pioneer and the submarines HMAS AE1 and HMAS AE2 had been added to the compliment. The Navy also had some obsolete gunboats and torpedo boats left over from the colonial days.
There was a rather uncomfortable reality which required immediate remediation at the outbreak of war. The Germans had stations pretty much on our doorstep in German New Guinea and New Britain. From these locations German raiders were now slipping out into the Pacific and Indian Oceans, intent on causing as much disruption to Allied shipping as possible. And this obviously included any future troop transports that may be leaving Australia in the coming months.
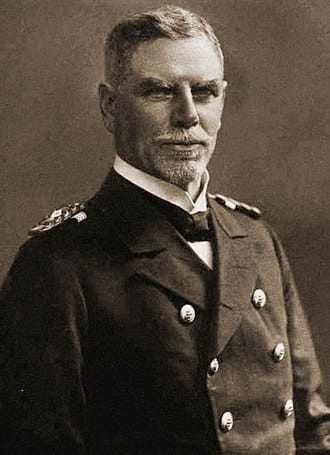
So, while the troops who would eventually fill out those troopships rushed to recruiting depots and underwent their initial training, the Navy was already preparing for its first offensive operation. The strategic locations of the German possessions enabled Vice Admiral Von Spee to control his Asiatic Squadron via wireless networks and other facilities. The armoured cruisers Scharnhorst and Gneisenau and the light cruisers Emden, Nurnberg and Leipzig could be moved around like chess pieces to gather intelligence and strike if a suitable target presented itself.
To try and neutralise this threat, the first coalition operation involved the Australia and Melbourne in company with the Royal Navy’s Psyche, Philomel, Pyramus and the French cruiser Montcalm, escorting a force of 1400 troops to German Samoa. Seeing all this military might heading their way the colony surrendered without a fight.
Melbourne then went to the German held island of Nauru with orders to destroy the wireless station there. Twenty-five of Melbourne’s crew landed on 9 September, rocked up to the German administrator and arrested him. The administrator had saved them the effort of destroying the wireless as he’d already taken care of that before they arrived.
It was all quite easy. But that was about to change. Samoa and Nauru were nice stations to capture, but the important ones were around New Guinea, particularly at Rabaul on the island of New Britain. If you’d like to take a moment and check out a map of the general Pacific region, you’ll see why Rabaul was so important. Off you go, I’ll wait.
Done? Ok, so you’ll note New Britain is a fairly large island off the east coast of New Guinea. From here German vessels could sortie out in all directions, maybe even take a sneaky run down the east coast of Australia if they so desired. It obviously had to be taken, but just as obviously, the Germans would want to keep it for themselves.
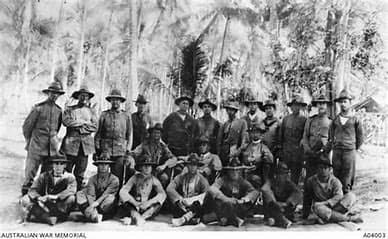
To undertake this operation an all-volunteer force was raised, known as the Australian Naval and Military Expeditionary Force, or ANMEF for short. From here on I’ll just call it ‘the Force’. It consisted of 500 naval reservists, Royal Navy seamen and a battalion of 1000 infantry. It was raised fairly hastily, and just over one month after the declaration of war the Force sailed. The exact whereabouts of Spee’s squadron was unknown at the time so the Force was accompanied by a strong naval escort consisting of Australia, Sydney, Encounter, Parramatta, Yarra, AE1 and AE2, a store ship, three colliers and a transport. So basically, most of the RAN.
Intelligence reports suggested there were two wireless stations in the vicinity, one at Bitapaka and the other at Herbershohe, just inland from Rabaul. Two parties of naval reservists were formed to capture each station.
On 11 September 1914, under the command of Lieutenant Bowen of the RAN, 25 sailors landed and headed inland to take Bitapaka. Rather than head straight up the main road and being visible to any potential defenders lying in wait, a scouting party went through the scrub and somehow found themselves behind the German first line of defence. Not wanting to waste the advantage, they opened fire and wounded the German commander who then ordered his native troops to surrender.
With the Commander as their captive, the scouting party ordered him to lead their march towards the next German outpost. He was ordered to tell his comrades that 800 troops had been landed and were making their way to this position. A message was sent to the defence Commander who thought, as he was so heavily outnumbered there was no point in resisting and so ordered his troops to surrender. Which goes to show that bluff and brains are sometime a much better option than attempting to take a position by force.
With Bitapaka’s forward defences now neutralised it was only the garrison of Bitapaka that could now put-up resistance.
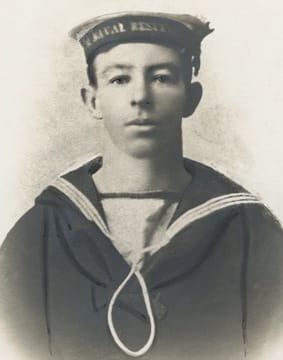
Bowen pushed on quickly and soon came across a series of enemy trenches and snipers firing from hidden positions up in the trees. It was during this phase of the operations that Australia suffered the first of what would become 60 000 fatalities during the war. Able Seaman Billy Williams was a naval reservist, only days away from completing his five-year service requirement, when war broke out. He was called up for active duty and landed with the first group to go ashore.
During the fighting at Bitapaka he was seriously wounded and taken back to the coast to be loaded onto a ship for medical treatment but died soon after.
The second fatality came very shortly after. Captain Pockley was a medical officer who went ashore with the raiding party. When Billy Williams was wounded, Pockley handed his Red Cross armband to another man so he could carry Williams to safety without being shot at.
Pockley was assisting a German Sergeant Major who had been shot through the hand. The German told him to take cover or to put up a Red Cross flag, but Pockley didn’t have a flag and refused to leave the wounded man. His was in the process of amputating the hand when he was shot and killed.
At around 10am a group of reinforcements arrived with Lieutenant Hill of the Yarra, adding a further 59 men to the Australian side. After a quick consultation, Bowen and Hill began a flanking movement, but Bowen was wounded as the advance began, with command now falling to Hill. The attack stalled until more reinforcements arrived under Lieutenant Commander Elwell of the Royal Navy who took command and got things moving again. He sent Hill to take charge of a flanking movement around the left while he himself took another force around to the right.
While leading a bayonet charge on the right, Elwell was killed and once again Hill was left in command. Hill pushed on but it wasn’t until a small band of reinforcements arrived under Lieutenant Gillam that things began to move forward again.
The numbers by that stage were now well and truly with the Allies and the defenders reluctantly agreed to unconditional surrender. Not all got the message through though and when Lieutenant Bond was ordered to advance and secure the wireless station several small skirmishes broke out, leading to further casualties. Bond rushed forward and disarmed eight Germans in the presence of 20 German native troops. Later he personally captured five armed natives. For these actions he was awarded the Distinguished Service Order, the first Australian to be decorated during the war.
The next day, Herbertshohe and Rabaul were taken without a fight when the German forces surrendered. Over the next few weeks most of the German territories, most significantly those on Bougainville and the Admiralty Island, were seized with very little resistance. All up, the German wireless network had been disabled for the cost of six dead and four wounded.
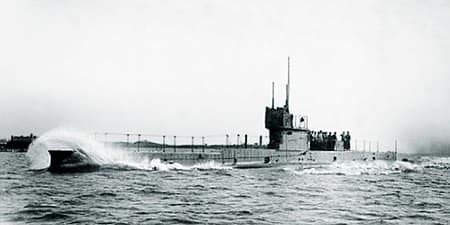
But these number don’t take into account those lost in the RAN’s first operational disaster. The submarine AE1, along with her sister vessel AE2, was involved in these operations. After the capture of Rabaul, AE1 departed Blanche Bay at 7am on 14 September to patrol off Cape Gazelle in company with HMAS Parramatta. By the end of the day, the Parramatta had returned from the patrol, but there was no sign of AE1. A search party was sent out but were unable to find any trace of her. She was officially listed as lost with all hands. 35 crew members were lost.
It wasn’t until 2017 that the location of the wreck was discovered. In September 2018 a research team from the National Maritime Museum concluded that a ventilation valve had been left open, probably to make conditions inside the sub a bit more comfortable in the tropics. When the vessel dived, water flooded into the engine room through this valve and all control was lost. AE1 sank below 100 metres where the pressure caused it to implode, killing everyone instantly.
Despite the fact they’d taken control of the wireless stations, the sea lanes were still not safe for the Allies. The ships which those stations had controlled were still out there, somewhere. Spee’s squadron was known to be somewhere in the Pacific, which is about as much use as saying I live somewhere in Australia. On the other side, in the Indian Ocean the raiders Konigsberg and Emden were still floating around. Spee’s fleet was a concern, but it was these two raiders that were the big problem. Any troop transport making its way from Australia to Europe would have to run the gauntlet of the Indian ocean, a juicy target for a couple of quick, well-armed vessels.
On 30 September Spee’s cruisers had raided Tahiti. This put them well to the east of Australia and New Zealand which meant those troops waiting to embark from the eastern states and New Zealand could now get underway to the designated assembly point in Albany, Western Australia.
The RAN as this stage were dealing with German merchant shipping in the Bismark Archipelago, the series of islands including New Britain and New Ireland. These actions ensured any German garrisons left were effectively starved of supplies, but in the larger picture of the war, it wasn’t exactly making a huge impact. It was the Indian Ocean where the action was or was at least likely to be.
The troops of the First AIF were sitting around off Albany wanting to get into the war, but to send the convoy on its way without an escort would’ve been disastrous. The HMAS Melbourne and Sydney were dispatched from the east to the Indian ocean to form part of the escort of the convoy, along with HMS Minotaur. And finally, the Japanese battlecruiser Ibuki lent its potential firepower to the convoy as well.
Funny isn’t it. In 1914 a Japanese warship was protecting Australian troops. Twenty-eight years later, Japanese warships were attacking Australians. Once again, I wonder how human beings survived evolution.
So, these four ships would be responsible for the safe passage of 38 Australian and 10 New Zealand transport ships, 21 500 Australians, including 25 nurses, 8 500 New Zealanders, 12 000 horses and all the associated medical and military equipment required. Not to mention the hopes of all those family and friends left behind. Talk about a heavy burden.
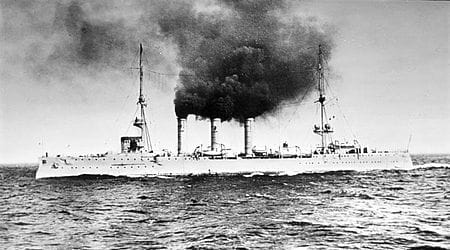
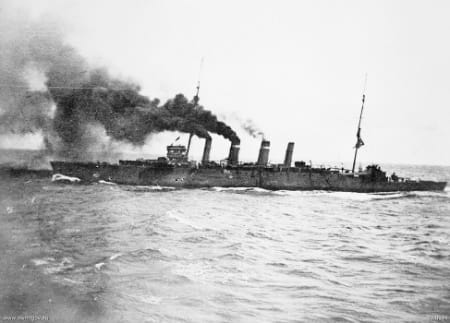
Although the Konigsberg was a threat, it was the Emden which was the main concern. Under the command of Captain von Müller, in only six weeks, Emden had captured or sunk almost 100 000 tons of merchant shipping, destroyed oil tanks in Madras and had also sunk the Russian light cruiser Zemtchung and a French torpedo boat destroy Mosquet. Von Müller and his crew were certainly active.
With the escort vessels all set to go, the first convoy of Australian troops to leave Australia pulled away from Albany on 1 November 1914. Strict security measures were enforced, with no light to show during the hours of darkness, except those essential for stopping the ships running into each other. With a convoy of that size, they were necessarily spread out over a fair distance, and the four escorts were kept busy keeping a watch on all directions. If a fast-moving warship managed to get in amongst the transports, they could do a lot of damage. A fact of which everyone on those transports would have been aware.
So, you could well imagine the concerns some of those people would’ve felt when, on 9 November, the Sydney was seen to raise smoke and shoot through at a great rate of knots. Rumours would’ve swirled around the convoy as to what exactly this meant.
What it actually did mean was the Sydney was heading off to locate and join battle with Emden.
Captain von Müller was surprisingly unaware that the convoy had left Albany, but he had intercepted some wireless messages which indicated that the search for his ship was zeroing in. His best course of action, as far as he saw it, was to disrupt the radio network which was being used against him. He decided the British wireless station on the Cocos Islands was his best bet. Not only would it disrupt communications, but if would draw British shipping to that area, by which stage he planned to be long gone and attacking merchant shipping near India.
Von Müller actually cut across the convoy about 40 miles to its front during the night of 8 November while heading to the wireless station. He arrived off Direction Island in the wee small hours, poorly disguised as a British cruiser. The station Superintendent wasn’t stupid enough to fall for the ruse and quickly sent an SOS before Emden jammed his transmission.
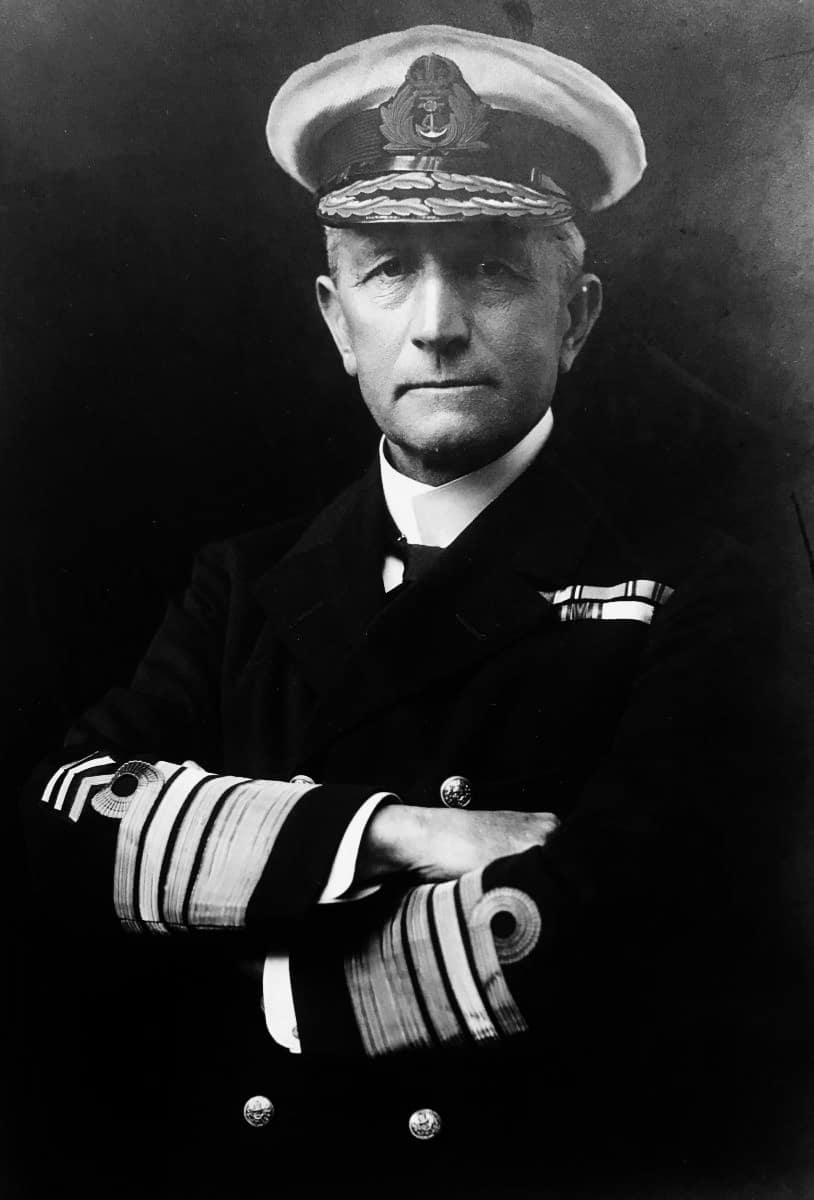
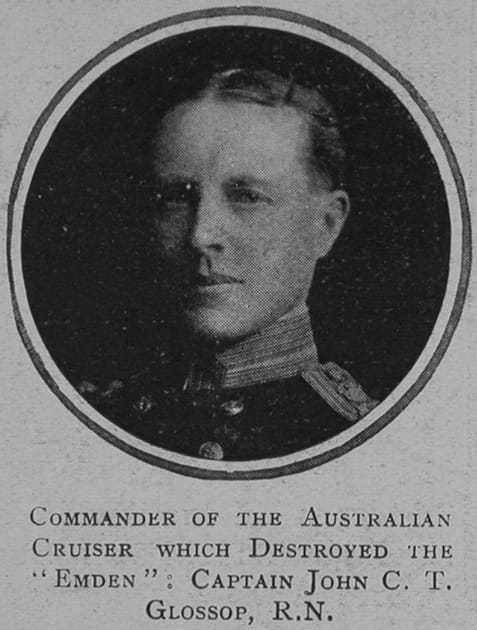
The Germans landed and got to work destroying the station by smashing the wireless equipment, cutting telegraph cables and blowing up the wireless mast. Unfortunately for them, the SOS message had been received by HMAS Melbourne. The Melbourne was the lead vessel of the convoy and so wasn’t able to depart and investigate, so Sydney under the Command of Captain John Glossop was ordered to go have a look.
Around 9:30 in the morning of the 9th Sydney and Emden engaged. Sydney had all the advantages, her guns’ range was superior to Emden and she was faster as well, despite being heavier. But despite the advantages, Sydney was the one to receive the first shock of the day. Like most British naval commanders, Glossop underestimated the range of the German’s 4.1inch (105mm) guns.
Von Müller’s tactics was to try and get in quickly and inflict as much damage as possible. Maybe a couple of lucky shots might take out Glossop’s bridge, or cause damage to the engine or to the turrets. A disabled Sydney would be easier to escape from.
Thinking that Sydney was beyond Von Müller’s range, Glossop wasn’t too concerned, but the Emden opened up unexpectedly and with accuracy. Her first barrage damaged the Sydney’s control platform and range finder in the upper bridge. The Sydney had four sailors killed and a dozen wounded from this barrage, but they were to be her only casualties of the engagement.
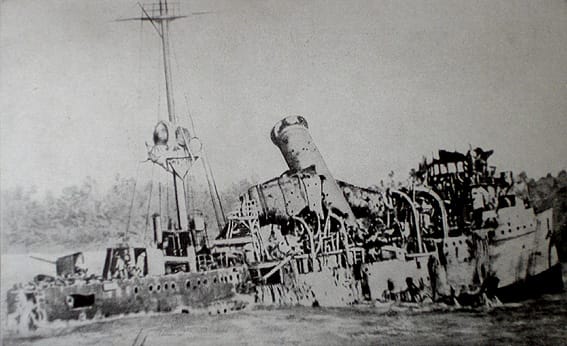
This woke Glossop up to the actual range of the German guns and so he used his superior speed to move back out of range, while returning fire at ever lengthening range. Von Müller’s gamble hadn’t paid off and his ship was subjected to accurate fire from Sydney. Emden continued to return fire but as she took more and more punishment, one by one her guns stopped firing. By 11:00am only one was still in action. Her fire control positions, forward funnel and foremast were all shot away and she was basically on fire from bow to stern.
Von Müller accepted the Emden was lost and he now turned his efforts towards saving what crew he had left. He turned for North Keeling Island and beached the ship.
Seeing Emden on the ground, Glossop turned his attention to the collier Buresk, which had been servicing Emden. But, seeing the writing on the wall, the crew of Buresk scuttled the ship before she could be seized.
Glossop then returned to Emden at around 4pm and to his surprise she was still flying the German ensign, which according to the rules of maritime warfare meant she was still in the fight. This left Glossop in a tight spot. Obviously, she was destroyed, but last Glossop knew, Emden still had that one gun in action. Von Müller had shown himself to be a tenacious and brave opponent. Was he maybe luring Glossop in to give him one more volley before being blown to pieces? Or had he just forgotten to lower his flag amidst everything else he was dealing with?
Glossop tried to signal Von Müller but no response was received. Was his radio destroyed? Possibly. Was he ‘playing dead’ to lure the Sydney closer? Also possibly. In the end Glossop was left with little choice but to reluctantly put another two salvoes into Emden. The flag was very promptly lowered, and the engagement officially came to an end.
But Sydney still needed to check on the situation on Direction Island, the location of the wireless station. It wasn’t until the following day that the crew of Sydney could come and render assistance to what was left of Emden’s crew. She had gone into the engagement with a compliment of 316. Of those, 134 were killed and 65 wounded. The scene onboard Emden shocked many of the Sydney’s crew. It was the first time they’d come face to face with the realities of naval conflict. As they searched the ship for dead and wounded sailors, they could only imagine the horror those men had endured. It cooled the enthusiasm for war which most of them had carried up to that point.
They developed a certain admiration for their erstwhile enemy. Although obviously out gunned they came into the fight anyway and continued to fight long past when they should’ve quit. When they had taken the survivors onto Sydney the Emden’s officers were allowed to keep their swords and the general sailors were treated with respect. After a few days eating in the same mess the officers from both ships reached the conclusion that although it was their job to knock one another out, there was no malice in it.
As a further mark of respect for the defeated enemy, as the Sydney sailed into Columbo Glossop radioed ahead requesting that the other ships not cheer and celebrate, although it doesn’t appear as though everyone got the message. Banjo Paterson, accompanying the troops as a war correspondent reported,
‘Arrived in Colombo to find everybody in a wild state of excitement. We can hardly believe that Australia’s first naval engagement could have been such a sensational win, for our people are not seagoing people and our navy-which some of us used to call a pannikin navy-was never taken very seriously. And now we have actually sunk a German ship!’
So that basically took care of the threat in the Indian Ocean, but the Pacific was still dangerous. There was no significant Australian involvement in the hunt for von Spee, but as part of the hunt, HMAS Australia was ordered to the American Coast, rendezvousing on 29 November with the Japanese cruisers Asama, Idzumo and Hizen. Von Spee decided to raid the British coaling station at Port Stanley in the Falkland Islands. He didn’t realise that a British fleet under Commander Sturdee, was already there and upon see Von Spee’s ships heading his way, Sturdee went out to meet them. Before long Scharnhorst, Gneisenau, Leipzig, Nürnberg and the colliers Baden and Santa Isabel were sunk by HMS Invincible and HMS Inflexible. This put an end to the threat in the Pacific and so meant that troopships from Australia could now sail to Europe and the Middle East with only a light escort.
And so we come to the end of 1914. I reckon this is a pretty good spot to end this instalment. So next time, we’ll take up the story again and cover off the RAN role at Gallipoli and then in the European Theatre and the Mediterranean.
Catch you then.
Other military items by the author, Warwick O’Neill, can be found at: https://www.australianmilitaryhistorypodcast.com/
You can read more about the author, Warwick O’Neill, here.
