
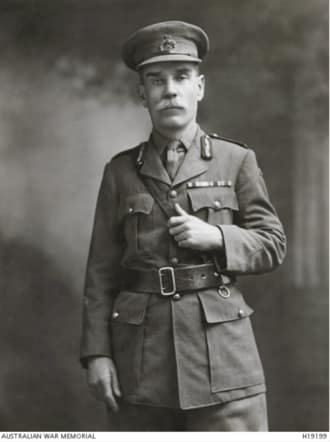
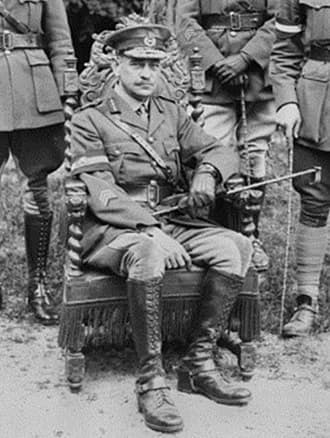
When it comes to polarising figures in Australian history, somewhere up the top of the list you’ll find Sir Thomas Blamey. On one hand he played a large role in extracting Australian troops from North Africa and bringing them home to defend Australian interests. On the other hand, he accused the under trained and under equipped 39th Militia battalion of cowardice because they fell back under the onslaught of highly trained and battle-hardened Japanese troops.
It’d be fair to say I’m no fan, but it would be hard to argue that Blamey hasn’t played an important role in the overall story of Australian military history. So in my ongoing attempts to present a professional and balanced podcast I present unto you all the story of Australia’s one and only Field Marshall, Thomas Blamey.
As you can imagine, the story of someone who fought through World War 1 and then commanded troops through World War 2, with a stint as the Victorian Commissioner of Police, is going to be quite a long one. So I reckon I might do the intelligent thing and break it up into two articles. The first one focussing on his Great War exploits and his interwar years and the second one, surprisingly enough, will focus on his World War II exploits.
Thomas Albert Blamey was born on 24 January 1884 near Wagg Wagga, the son of a butcher. He was educated at Wagga’s Superior Public School, which begs the question, was there a Wagga Inferior Public School? I digress.
From 1899 he was employed as a pupil teacher, assisting those in lower grades and was an active participant in the school cadets. Four years later he became an assistant teacher at Fremantle Boys School where he maintained his interest in the cadets, building his leadership skills. He attended the Claremont Methodist Church, occasionally preaching and was offered the post of probationary minister, which is interesting considering some of his predilections in later life. But we’ll get to that.
The church did tempt him, but he was always more drawn towards military pursuits. In 1906 he saw an advertisement for applications for commissions in the Commonwealth Cadet Force. Applicants were required to submit to an examination and out of all applicants from across the country, Blamey placed third, so he obviously had a natural affinity with military matters. He was appointed Lieutenant on the Administrative and Instructional Staff in November and was posted to Melbourne.
He was a keen soldier and threw himself into his role, continuing to improve his knowledge of all things military. On 8 September 1909, obviously feeling no man should be happy his entire life, he got married to Minnie Caroline Millard who was nine years his senior. The pair would have two sons, Charles and Thomas. Charles died in 1932 in a plane crash while serving in the RAAF. Thomas Junior would go on to serve in the Second AIF, under his father.
In 1910, Blamey was transferred to the Australian Military Force as a captain. The AMF had been established upon the recommendations of Lord Kitchener after his tour of Australia in the early 1900’s. It was primarily an administrative body which oversaw the training of young boys and militia units. Many of the officers of the AMF would go on to become the core of the staff of the AIF in World War 1 – as discussed in the previous article on Brudenell-White.
In 1912 he gained entry to the staff officer training course at the Staff College at Quetta in India. This was a competitive selection with applicants from across the Empire, so it was no small feat to be accepted. According to the commandant, Blamey arrived ‘uneducated in a military sense’ and that’s worth giving further consideration to. From that statement you can determine that many of the other attendees must’ve had some kind of military knowledge, either growing up with high-ranking families or attending prestigious boarding schools throughout the Empire. He threw himself into his studies and in late 1913 he graduated with a B pass.
His commandant did have something else to say about him. Military knowledge wasn’t the only thing he was lacking when he arrived. Apparently, he ‘is not gifted with large amounts of tact, but is not conspicuously devoid of that very necessary quality.’
I take that as meaning that tact was not a natural part of his makeup, but he could use it when necessary. This would come in handy on some occasions during World War 2.
After graduating from Quetta, Blamey went to England in 1914 to gain further experience in staff work. He was still in England, working in the War Office, at the outbreak of World War 1. During the opening months of the war, he worked in the Intelligence Branch, preparing summaries for the King and Lord Kitchener.
When the Australian Imperial Force was landed in Egypt, Blamey was sent to meet them and became a general staff officer, 3rd grade, in intelligence. Interestingly, on the ship taking him from England to Egypt he had Colonel Harry Chauvel for company. Chauvel would go on to lead the Desert Mounted Column from 1916 until the end of the war, and stand alongside Monash as the two great Australian generals of the war.
Blamey took part in the Landing at Gallipoli on 25th April 1915 as part of Major General Sir William Bridges 1st Division Headquarters alongside Brudenell White. When a message was received from Colonel McCay of 2nd Brigade that reinforcements were needed at 400 Plateau, Blamey was ordered forward to assess the situation. Dodging the Turkish fire, he moved up and surveyed the area and confirmed the Plateau was where the reinforcement should be sent.
During those first weeks, there wasn’t a great deal for an intelligence officer to do. The confused nature and regular changes to the front-line kind of limited the scope of operations a bit and in reality, during that phase, obtaining an intimate knowledge of the enemy took a back seat to merely securing a position within the ridges.
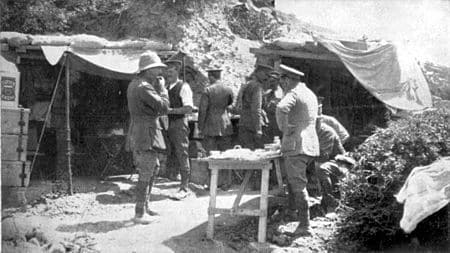
But as things began to settle and a kind of rhythm settled over the Peninsula, a bit of knowledge of the lay of the land was beneficial. Of particular interest was a group of Turkish artillery guns somewhere in the vicinity of the Olive Grove. These guns had been putting down a harassing fire towards the beach, but the Anzacs had been unable to silence them. The Turk’s expertise at camouflage meant the Allied artillery and ships guns didn’t know exactly where to fire.
So, on the night of 13 May, Blamey led a patrol in behind the Turkish lines. Apart from Blamey, the party consisted of Sergeant J. Will and Bombardier A. Orchard. The three men approached Pine Ridge and unfortunately for them, a patrol of eight Turks also approached Pine Ridge at the same time. One Turk tried to bayonet Bombardier Orchard, but Blamey shot the Turk with his revolver. During the following skirmish six Turks were killed and Blamey figured the guns could wait, because no doubt the noise of the fight would attract quite a bit of attention and it was a good time to be somewhere else. He was mentioned in dispatches for this action.
From his actions at 400 Plateau and on the 13 May, it’s obvious that Blamey was not short on a bit of personal courage. He was willing to take whatever risks the job entailed and remained cool under pressure.
So, ya know, credit where credit is due.
His actions over the next couple of months bought him some notice and on 21 July 1915, he was given a staff job as a general staff officer, Grade 2, along with a temporary promotion to Lieutenant Colonel. On 2nd August he joined the staff of the newly formed 2nd Division which was currently finalising its training in Egypt, as assistant adjutant and quartermaster general.
But when the 2nd Division sailed for Gallipoli, Blamey was not on board. He’d just had an operation, a small procedure around the freckle region, to sort out a haemorrhoidal issue. But he recovered quickly and by 25th October he was back on the Peninsula with the 2nd Division. By this stage though, the Gallipoli campaign was beginning its end. The August Offensive had failed dismally, the new Landing at Suvla Bay had ground to a halt, and General Sir Ian Hamilton had been recalled to England and replaced by General Sir Charles Munro. Munro surveyed the scene and saw the futility of it and recommended withdrawal. Winston Churchill, one of the main instigators of the campaign and someone never short of a cutting remark, said of Munro ‘he came, he saw, he capitulated.’
Back in England, Kitchener received Munro’s report which cause some confusion, because the reports he had been receiving from Hamilton were completely at odds with Munro’s assessment. In November, Kitchener himself arrived on the Peninsula and saw two things almost immediately. One, the Anzacs had done an incredible job just to hold on to their precarious position and two, it was a waste of resources and manpower to keep them there.
The evacuation was ordered and in December Blamey left Gallipoli along with the 2nd Division. Throughout the rapid restructuring of the AIF during the first months of 1916, Blamey remained at 2nd Division headquarters and sailed to France with the Division.
But once in France there was a reshuffling of senior staff appointments and Blamey once again found himself in the 1st Division, this time as a General Staff Officer Grade 1. This placed him in a pivotal role for the planning of Australia’s first full-scale battle of the war – Pozieres. It was here that Blamey’s particular talent for planning began to show through. He visited British Divisions which were already fighting on the Somme to gather as much information on what had worked and what hadn’t, and then quickly circulated a memorandum throughout the Division prior to their attack.
The memorandum, or part thereof, dated 14th July 1916 is included in documents held from the 1 Division Engineering companies. This copy seems to relate mostly to the coordination between infantry and engineers so I’m guessing the engineers have just filed the part that is relevant to them. A copy of this memorandum can be found on the Australian War Memorial website under record number RCDIG0000924 for anyone interested in checking it out.
Whether or not his memorandum had much effect on the conduct of the opening attacks will probably never be known, but it does show his belief that you need to gather as much intelligence as possible to give the troops the best chance of success. But like everyone else at Pozieres, Blamey was soon to be confronted with utter confusion as the German’s concentrated their artillery on the recently captured ridge.
In August, with the 1st Division’s second rotation to the Pozieres front, Blamey noted that the mapping of the area was not clear, and he had to admit to, ‘vagueness both to our own and hostile positions’. Hardly an optimal situation. He set about trying to sort it out by sending out intelligence officers, but in the maelstrom that was Pozieres, no one was ever going to bring any real order to the place.
For his part though, Blamey was awarded the Distinguished Service Order in the 1917 New Years honours list.
By now General Birdwood, commander of the AIF, had noticed Blamey’s abilities and was considering him for a Brigade command. But Blamey had no real experience in commanding infantry troops, despite his now fairly elevated rank. So, Birdy figured that a bit of time as a Battalion commander would give him some valuable insights into the command of soldiers.
Technically going from a GSO1 back to a mere Battalion commander was probably considered a backward step, but given Blamey’s preference for commanders with battle experience during World War 2, which we’ll get to, it’s quite possible that Blamey agree with the idea. Either that or Birdwood had explained it to him and bought him around. On 3rd December 1916, Blamey took command of the 2nd Infantry Battalion. Then, because he was the highest ranking Battalion commander, on 28th December he became acting commander of the 1st Infantry Brigade.
No doubt anyone who hasn’t had at least some experience with the military system will be horribly confused about now. Anyone who has been in the services will no doubt be sitting there, nodding their heads saying ‘yeah typical military stuff around’.
But it’s all a moot point really. At no time during his couple of weeks as a Battalion commander did Blamey command troops in battle. And neither did he command at Brigade level. On 9th January he went on leave. By the time he returned, the whole plan to have him made a Brigade commander fell over, for an even more typical military stuff around. Ya see, General Headquarters of the British Army, got wind the Blamey had graduated from the Staff College. Because of this he was, and always should be, a Staff Officer. The only way a Staff Officer would be sent to command a front-line unit would be if they’d failed as a Staff Officer, which Blamey had not.
So, Blamey went back to his GSO1 role, but with a promotion to Colonel.
Shall we have a wee diversion here? Anyone notice the bit about Staff Officer graduates not being front line commanders, unless they failed at Staff Officering??? Anyone who’s even had a cursory glance at British staff officers during World War 1 would find this difficult to believe. No doubt there were many competent and even some brilliant staff officers, but there was also an overabundance of absolute plonkers. General Gough springs to mind, as does General Hunter-Weston at Cape Helles. Some of these senior staff officers presided over some completely ballsed-up operations, costing the lives of hundreds or thousands, and mostly they got promoted for their troubles. Makes you wonder just how badly a staff officer graduate needed to stuff up to be sent to a battalion command.
But back to Blamey.
For some reason, the records relating specifically to Thomas for much of the first half of 1917 go a bit cold. He was mentioned in dispatches twice, once in January, another in June, but that’s about it. There is a document which I stumbled across while trying to see what he was up to during this time. It has nothing to do with Blamey, but I want to share one of those little nuggets you occasionally come across when you’re skimming through official documents.
In among some documents from the commander of the 1st Division is Routine Order No. 33. 9th February 1917. It covers such things as the Officer of the Day, a note relating to delivery of parcels for men killed and the details of a General Court Martial, who’s required to attend and where and when. And then, after that serious matter and tacked onto the end of the official routine order, is this, ‘Lost. On road from Serapeum to 6th Battalion Camp at forward line of Defence – a pair of field glasses – Finder please return to Brigadier General J.K Forsyth, 2nd Infantry Brigade.”
I wonder if poor old Brigadier General Forsyth ever got his field glasses back. Sorry for that diversion, it just tickled my funny bone for a bit.
So anyway, fair to say that during the first half of 1917 Blamey was beavering away at his job as GSO1. Then on 27th August 1917 he was given the acting command of the 2nd Brigade until 4th September. The Brigade was again resting for this period so Blamey still hadn’t commanded a front-line unit in battle. And then in September he was admitted to hospital with vomiting and coughing. He was diagnosed with psoriasis, a debilitating autoimmune disease, and was evacuated to a hospital in England for treatment.
He returned to France as the GSO1 of 1st Division in November 1917.
Whatever he did during 1917 obviously caught the attention of the right people, because in the 1918 New Year’s honours list he was made a Companion of St Michael and St George (CMG).
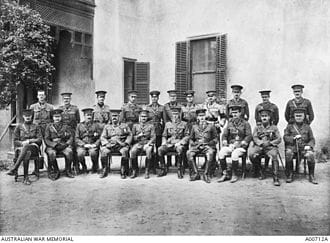
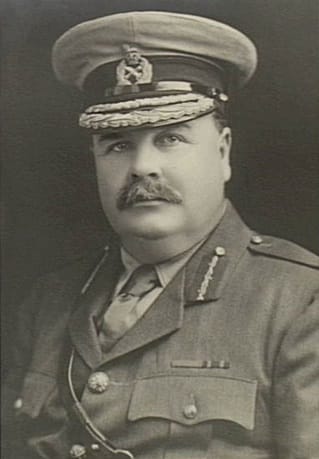
As far as the First World War was concerned, 1918 was the year Blamey really shone. With the bringing together of all five Australian Division into the one Corps, Blamey was promoted to Brigadier General of General Staff (BGGS) and became Chief of Staff to the Corps commander, General John Monash. It was these two men, working together, which cemented the Australian army’s reputation throughout the second half of 1918.
Probably the best way of explaining how their relationship worked is to hand over to none other than John Monash, who after the war wrote of Blamey:
“No reference to the staff work of the Australian Corps during the period of my command would be complete without a tribute to the work and personality of Brigadier General T. A. Blamey, my Chief of Staff. He possessed a mind cultured far above the average, widely informed, alert and prehensile. He had an infinite capacity for taking pains. A Staff College graduate, but not on that account a pedant, he was thoroughly versed in the technique of staff work, and in the minutiae of all procedures.
He served me with exemplary loyalty, for which I owe him a debt of gratitude which cannot be repaid. Our temperaments adapted themselves to each other in a manner which was ideal. He had an extraordinary capability for self-effacement, posing always and conscientiously as the instrument to give effect to my policies and decisions. Really helpful whenever his advice was invited, he never intruded his own opinions, although I know that he did not always agree with me.
Some day the orders which he drafted for the long series of history making operations on which we collaborated will become a model for Staff Colleges and Schools for military instruction. They were accurate, lucid in language, perfect in detail, and always an exact interpretation of my intention. It was seldom that I thought that my orders or instructions could have been better expressed, and no commander could have been more exacting than I was in the matter of the use of clear language to express thought.
Blamey was a man of inexhaustible industry and accepted every task with placid readiness. Nothing was ever too much trouble. He worked late and early and set a high standard for the remainder of the Corps Staff of which he was the head. The personal support which he accorded to me was of a nature of which I could always feel the real substance. I was able to lean on him in times of trouble, stress and difficulty, to a degree which was an inexpressible comfort to me.”
As a quick aside, Blamey’s orders were indeed included in units of study at staff colleges in the decades following World War 1.
The plans he worked on were mostly the Battle of Hamel in July and Amiens in August. Hamel was the prototype for Monash’s ideas of how an offensive should be fought. Blamey, who had maintained an interest in the technological innovations throughout the war was greatly impressed by the new generation of tanks and pushed for their inclusion, en-masse at Hamel. With complete success in that battle they could get on with planning the much larger attack at Amiens on 8th August 1918. Monash deservedly receives the recognition for the planning brilliance of these two attacks, but without a staff officer of Blamey’s calibre to bring it all together and do much of the leg work, they may not have been as successful as they were.
From Monash’s account you’d be forgiven for thinking that Blamey was a joy to work with, but a comment from AIF commander, Birdwood, gives another perspective. He said of Blamey, ‘an exceedingly able little man, though by no means a pleasing personality‘. Birdwood was known to be a chirpy, happy sort of a chappy, so whether Blamey’s more dour approach just rubbed him the wrong way, or whether Birdy picked up on some less savoury personality traits is unsure. But there is a chance that Blamey may have been beginning to display behaviours which would come to haunt him in the next couple of decades.
By the end of the war Blamey added a Companion of the Bath to his list of titles and had been mentioned in dispatches seven times.
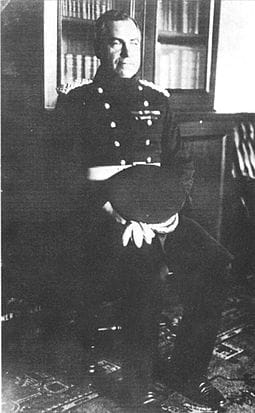
Blamey played a large part in organising the repatriation of Australian troops and by 20th October 1919, six years after leaving, he finally returned to Australia. He was posted to army Headquarters in Melbourne as Director of Military Operations. The following year he was made Deputy Chief of the General Staff. While in that role he worked hard with Lieutenant Colonel Williams of the Flying Corps to establish the RAAF. But it has to be said that it took a bit to get the RAAF off the ground, so to speak, and it was still a work in progress when he left for London as the Australian Representative on the Imperial General Staff, a most esteemed position, on 1st November 1922.
While hobnobbing in London, he mainly focussed on establishing a naval base at Singapore as a bulwark of defence for Australia from anyone who may choose that path. Little did he know exactly what the impact of that would be in twenty years’ time.
In June of 1923, the Chief of the General Staff, Major General Cyril Brudenell White retired, leaving the position open. Everyone thought Blamey would be a shoe-in for the position. But nay.
A number of senior Australian officers had been keeping an eye on Blamey’s rapid rise through the staff officer ranks. Many of these officers had commanded troops on the frontline at battalion and brigade level, something which Blamey had never done. Strangely enough, it was a Major General Victor Sellheim who bought the matter to a head.
I say strangely enough, because, like Blamey, Sellheim had never commanded troops in battle. In fact, he’d never really commanded anything. At the beginning of the war, he was the Assistant Adjutant and General Quartermaster of the 1st Division, but Major General Bridges couldn’t stand the bloke and so shuffled him off to the Australian Intermediate Base. This would eventually evolve into AIF Admin Headquarters, but by that stage Sellheim was back in Australia as Adjutant General in charge of raising reinforcements.
Sellheim wrote a letter to the Minister of Defence and protested the prospect of Blamey being given the role over more experienced officers, himself included. In the end the position went to General Harry Chauvel, hero of the Sinai/Palestine campaign.
But what of old Tom? Well, they created a new post just for him, 2nd Chief of the General Staff and there he remained until, in 1925, Sir Stanley Argyle, the Victorian chief secretary, offered Blamey the post of Chief Commissioner of Police. Blamey took up the offer and left the regular army to take up his new role. He transferred to the Militia to keep his hand in with military affairs.
Now, this is a military history podcast so the events from Blamey’s retirement from the regular army to when he re-joined for World War II kind of falls outside the scope of the podcast, but some events do speak loudly about the character of Thomas Blamey, so we will give them a slight coverage before heading onto part two.
His time as Commissioner of Police was dogged by controversy. First up, by this stage Blamey liked a bit of a drink. Nothing particularly wrong with that. He also had a penchant of the kind of loving you pay for by the hour, nothing particularly wrong with that either. The problem is, he was Commissioner of Police and consorting with prostitutes was a criminal offence. Which to me, shows a lack of possibly the most important personality trait, integrity. I mean, how many former soldiers in the 1920’s would’ve been hauled up in front of a judge for doing such things?
This first came to light in October 1925. Police raided a brothel and as they burst into one of the rooms, the gentleman client, waved a police badge. It was Blamey’s. The badge was seized and found its way back to the Australia Club where Blamey reassured everyone. Knowing that this would be a bad look, he leant on his good friend, Stan Savige (founder of Legacy among other things), and got him to write a statement saying that he had been drinking with Savige that night and so it couldn’t have been him.
The trouble was, the statement was only half true. He had been drinking with Savige earlier in the night. But there was plenty of time for him to get to the brothel afterwards. So not only did he hold his own integrity cheaply, he got a mate to compromise his own integrity to get him off the hook. As far as I’m concerned, there’s nothing worse than someone who would do that.
In the end he claimed he had loaned the badge to a friend, but wouldn’t say who that friend was. But that still raises the question, what kind of Police Commissioner would loan his police badge to anyone?
Anyway, during his tenure with Victorian police, he did make a wide range of improvements such as raising the number of women in the force, overhauling the promotion system and establishing a Licensing Branch. For his efforts he was created a Knight Bachelor in 1935, but the following year, controversy struck again. He was in the company of a couple of working girls who were victims in an armed hold up. During the investigation, under the pretence of protecting the reputations of the two women, Blamey gave a false statement. But it was probably more to protect himself after being caught a second time. Pressure was applied and he was forced to resign on 9th July 1936
So, I reckon that’s as good a place as any to pause and have a bit of an interlude. Next time, we’ll get into the World War II era, a time where Blamey’s military skills shone through, but his personal foibles took a lot of the shine off the man.
I’ll catch you then.
Related story: Field Marshal Sir Thomas Albert Blamey – Part 2
Other military items by the author, Warwick O’Neill, can be found at: https://www.australianmilitaryhistorypodcast.com/
You can read more about the author, Warwick O’Neill, here.
