
Warwick O’Neill, Military Historian
A quick question for you, Dear Readers. Apart from the bombing of Darwin and Northern Australia, and the torpedo attack in Sydney Harbour, on what other occasion did Japanese and Australian troops clash on the mainland? Give up? Well it actually occurred over 300km inland from Sydney in the small county town of Cowra. Strange name, pretty town, scene of a breakout of Japanese prisoners of war in August 1944.
But why did up to 900 prisoners charge the barbed wire and bullets? Where did they think they were going to run to? And who were the Australians who suddenly found themselves staring down hundreds of charging Japanese?
Let’s dive in and find out about The Cowra Breakout.
As the second AIF got into action in World War Two, they inevitably ended up taking prisoners. As they fought their way across North Africa in what they came to call the Benghazi Handicap, thousands of Italian soldiers threw up their hands rather than give up their lives for a fascist leader which many of them weren’t particularly fond of.
This created a problem. What to do with them all? There were neither the facilities nor manpower available in North Africa to contain them, and England adopted something of a “you caught ‘em, you keep ‘em” attitude. But in fairness to our Pomgolian comrades they were struggling against German air attacks on the soil of the Old Dart and so had more pressing concerns at the time.
The only viable answer was to ship them back to Australia and put them to good use in the fields, to replace the men who had joined up and become their captors. Under the Geneva Convention it was perfectly allowable to put POW’s to working at manual labour. So across the country POW camps were established to house these Italian, and occasionally German, gentlemen.
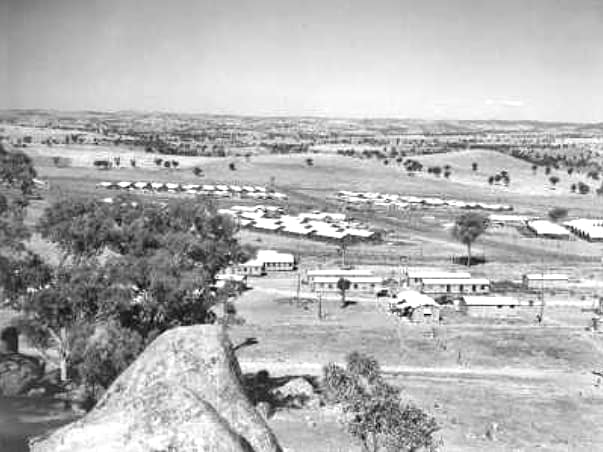
Then in late 1941, Japan entered the war with their attack at Pearl Harbour, the Philippines and their surge down the Malayan peninsula to capture Singapore. When they got to New Guinea they came up against Australian militia, initially, and then units from the Second AIF. Although the Japanese soldier was less willing to surrender than their Italian counterparts, the Australian troops still managed to nab a few of them. These few also ended up being transported to Australia, with just over two-thousand finding themselves accommodated in Cowra, alongside but segregated from the European prisoners.
Watching over all these former combatants were members of the Australian Militia’s 22nd Garrison Battalion. This Battalion consisted mainly old World War 1 veterans who were too old to carry a rifle across North Africa or the New Guinea jungle, wounded men who were unfit to be returned to front-line units, or other young fellas deemed to be not fit enough to serve elsewhere.
While conditions were generally pretty good by POW camp standards, and all in accordance with the Geneva convention, the relationship between the Australians and the Japanese weren’t necessarily as cordial as they were between the Australians and the European prisoners. ‘Cultural differences’ is often cited as the reason for this. Although not basing my own opinion on anything substantive, it doesn’t take much to draw a line between Japanese actions against Australian troops in the jungles and the Garrison’s lowly opinion of their charges. Keeping in mind that some of that Garrison would have seen first-hand the results of some of the atrocities dished out. But as I say, that’s just my opinion.
But, for the most part, things carried on day after day without much to disturb the peaceful sunny days spent in the tranquillity of rural New South Wales. But under the surface, the Japanese prisoners were suffering in a way that the Australian’s probably didn’t fully understand. They were living with the shame and dishonour of being prisoners of war. According to the Bushido Code, they should’ve died in battle rather than allow themselves to be captured. They felt themselves to be cowards. Not only did they bring shame onto themselves, they bought shame to their families. Some of them gave alias names when captured in the hope that their families back home would think they were dead, rather than having it confirmed that they were prisoners.
It was a shame that would eat away at many of them, until something came along which offered them a chance at redemption.
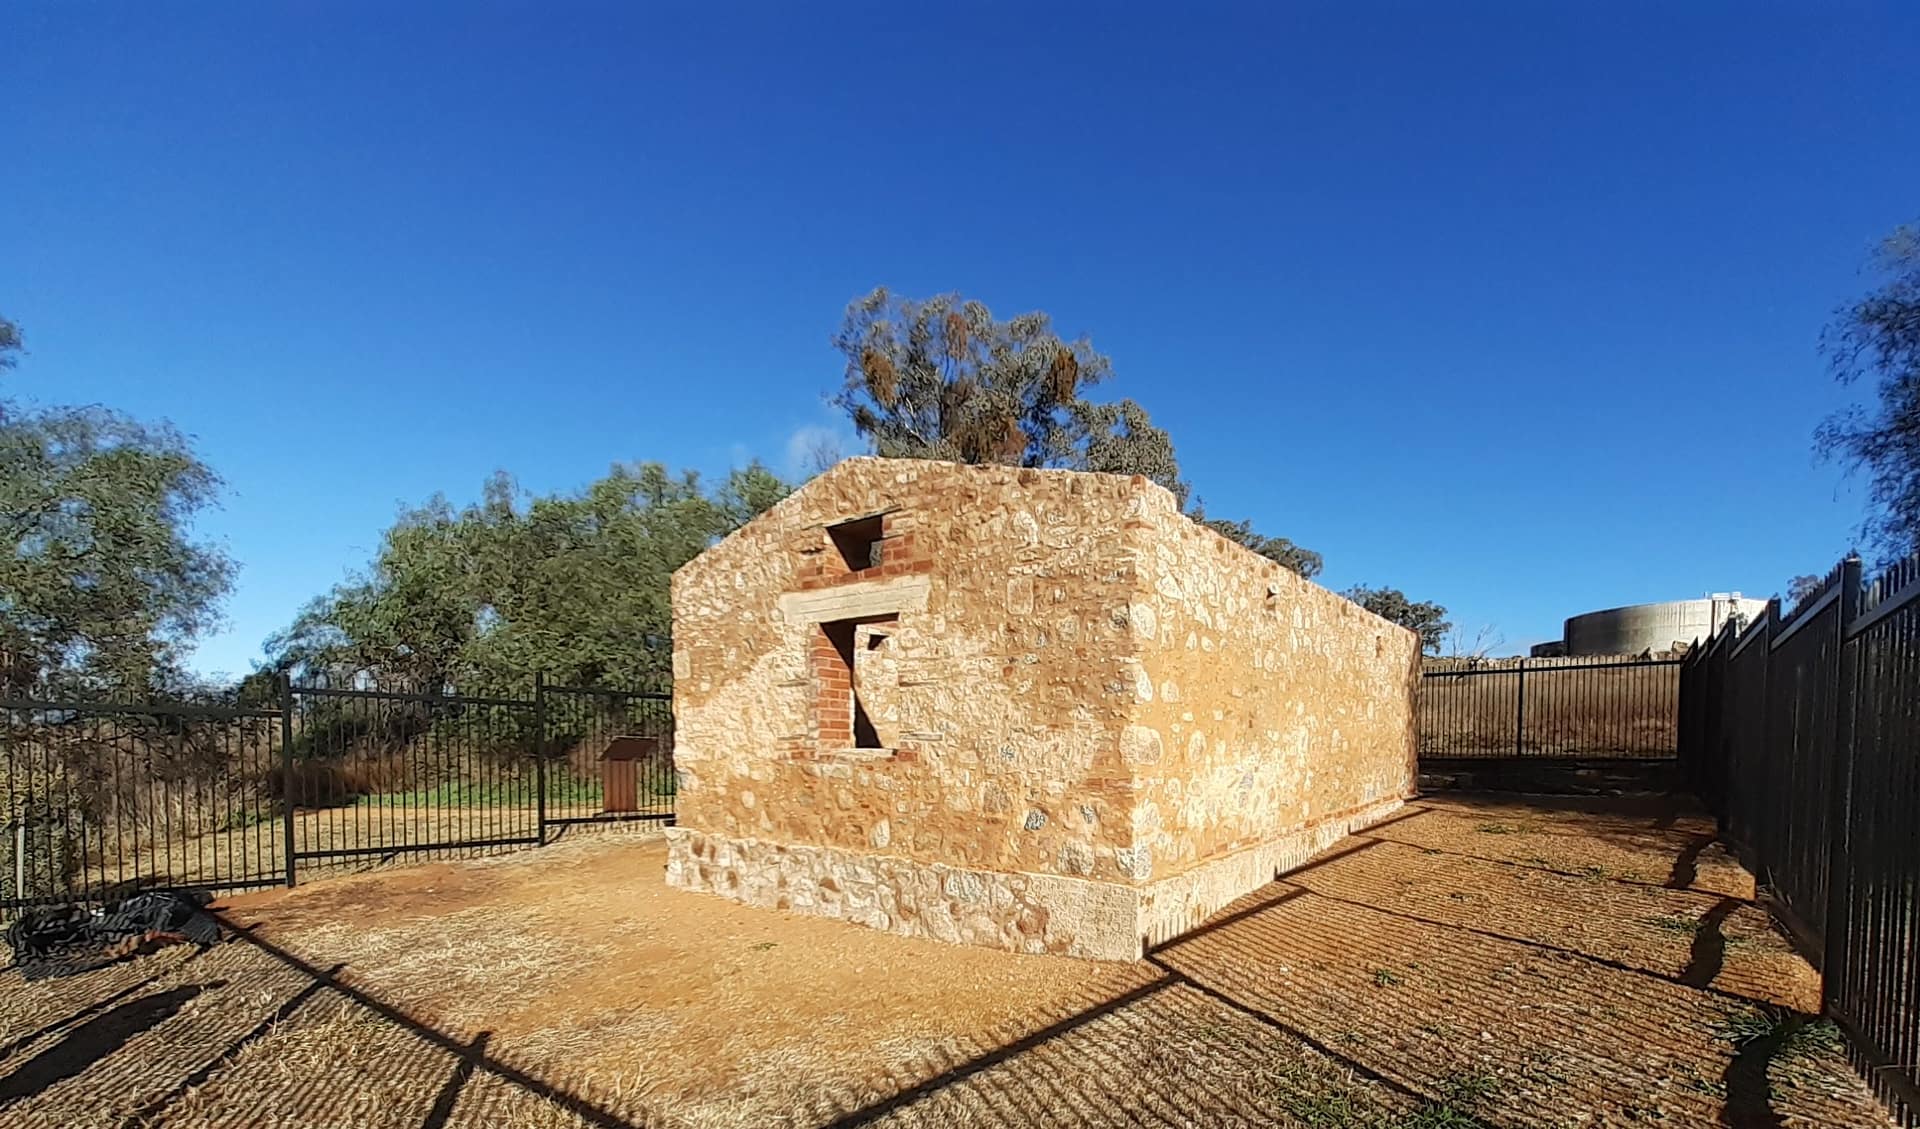
Photo: Australian Rural & Regional News
This chance came along in August 1944, but for the first link in the chain of events that precipitated the breakout we need to hop across the Tasman to a little town in New Zealand called Featherston in February of 1943. At Featherston the Kiwis had established their own camp for POWs and, as was usual in POW camps, the prisoners were put to work. Unfortunately by February 1943, a large number of prisoners had come to the opinion that they shouldn’t be forced to work and so about 240 of them staged a sit in.
The subsequent events have been disputed ever since, but not in dispute is the fact that Japanese Sub-Lieutenant Adachi was shot and wounded by the Camp Adjutant. The predictable result was the other prisoners either charging at, or appearing to charge at the guards, whichever way you want to look at it. Obviously feeling threatened by a couple hundred angry prisoners rushing at them, the guards opened up with rifle, machine gun and pistols. In the end 48 prisoners were either killed outright or died of their wounds. One New Zealander was killed by a stray bullet.
At a court of enquiry, the majority of blame for the incident went to the prisoners, but again cultural differences were cited.
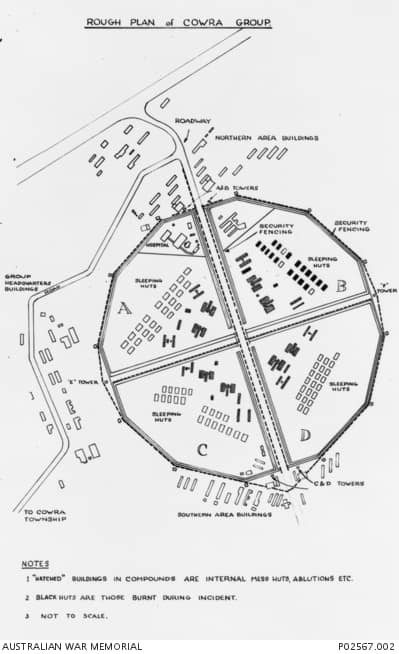
Obviously this incident didn’t go unnoticed in Australia and the decision was made to tighten security at Cowra. The Garrison was issued with Vickers and Lewis Machine Guns, all pointing inwards as a deterrent to anyone wanting to get out and see the countryside. Six guard towers were erected to provide full view of the entire camp. But there were substantial areas outside of the huts which were not fully open to the view of the guards.
Things bubbled along. There was a bit a tension between captors and captives, but generally without too many issues. But in August 1944, the authorities were tipped off to the possibility of trouble from the Japanese prisoners and so it was decided to move all prisoners, except NCOs and Officers to another facility at Hay, about 400 kilometres to the west. When the prisoners were advised of the move they decided that the time to act had come.
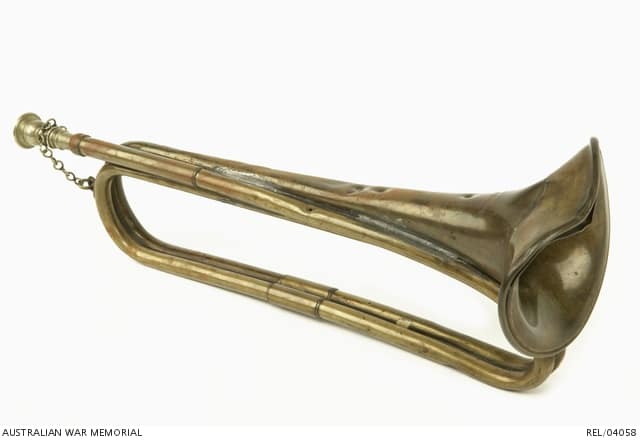
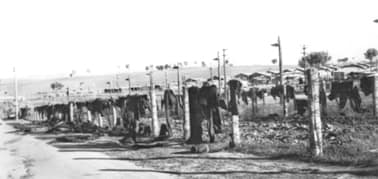
At about 01:50 on the morning of 5th August 1944 a solitary bugle call sounded in the still night air. No doubt the guards on duty at the time wondered why someone would be blowing a horn in the middle of the night. But they didn’t have to ponder this for very long. The bugle call was a signal for roughly 900 Japanese prisoners, assembled in their huts, to burst forth and charge the fences surrounding their compound. A number of the huts were set alight as their occupants surged out.
According to the Military enquiry, the prisoners had armed themselves with knives, many of them mess knives which had been sharpened into weapons, baseball bats and improvised clubs, and even a sword fashioned from a bread knife.
To protect themselves from the barbed wire fences, many wore baseball gloves, while others wrapped toilet paper around their hands while wearing towels around their bodies or two or three layers of clothing. Some were carrying lengths of rope which they had fashioned out of old rice sacks.
The alarm was raised and in the time it took the Garrison troops to wake up and rush to their positions, the Japanese had broken through the compound fence in three places, with one group finding themselves on an internal road which ran through the camp. This group then broke into two with one group charging the gate to the north and the other heading to the south.
Both groups were met by rifle fire from the Garrison and the survivors were forced to take cover in drainage ditches where they remained until daybreak. They were then rounded up and marched back to the compound.
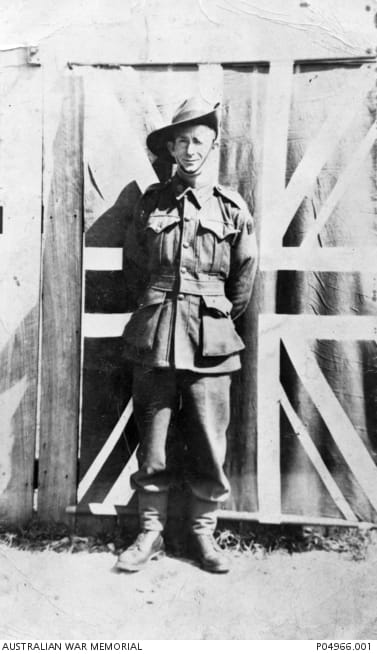
The other two groups which had breached the compound pushed harder. One group charged directly at a Vickers gun, manned by Private Benjamin Hardy and Private Ralph Jones. The two men cut down many of the attackers but the sheer number of Japanese meant that their position was going to be overrun. Recognising the hopelessness of their situation they removed the firing mechanism of the gun and threw it into scrub. In doing so they prevented the Japanese from capturing the weapon and turning it on the remainder of the garrison. Unfortunately, moments later the Japanese were onto them and the two men were killed. They were each posthumously awarded the George Cross for their bravery. The George Cross is the highest award for valour outside of a war situation. Like a civilian Victoria Cross.
Photo: courtesy Australian War Memorial
One group of Japanese charged at the barracks which housed the garrison, but the Australians were quick into action and were able to put down heavy fire which prevented the Japanese from advancing any further and inflicting heavy casualties.
A large group of just under 400 prisoners managed to breach the perimeter and advance beyond. Seventy of these men took up position on a hillside overlooking the Garrison Headquarters hut and chose to remain there until daybreak, at which point they were rounded up and escorted back to the camp. It makes you wonder why, having broken out, these men just sat there, waiting to be taken back into the camp. Maybe they felt they had restored a bit of honour in simply breaking out. Maybe they had no idea what else to do in a strange land, totally unaware of exactly where they were in that land. Who knows?
The remainder of the escapees headed into the bush and scattered. It later became known that the prisoners had agreed that, should they be successful in breaking out, they weren’t to harm any civilians. But that was later, at the time you can only imagine how the garrison troops must have felt at the knowledge that over 300 enemy soldiers were now loose in the region. Local farms, many of which had their men away at war, were now vulnerable. The garrison wasted no time in assembling search parties.
However, as day broke over the camp, there were many wounded Japanese requiring urgent medical attention and many of the garrison’s troops were put to work bringing in the dead and wounded.
An inspection of the barrack huts was also conducted and discovered 20 charred bodies throughout the buildings. Further investigation showed that eight of them had been hung, while the other twelve had died either at their own hands or at the hands of their comrades.
During the first day of the search, a party led by Lieutenant Harry Doncaster was ambushed by a group of Japanese and although the party was able to fight them off, Lieutenant Doncaster was killed.
Private Charles Shepherd was the only other Australian fatality, stabbed to death by one of the prisoners during the escape.
It took nine days for the search parties to round up 334 escaped prisoners, 25 of whom were discovered dead, 11 from hanging, 2 from placing themselves on railway tracks and the others showing signs of being stabbed with the types of weapons which the prisoners had fashioned for use throughout the breakout.
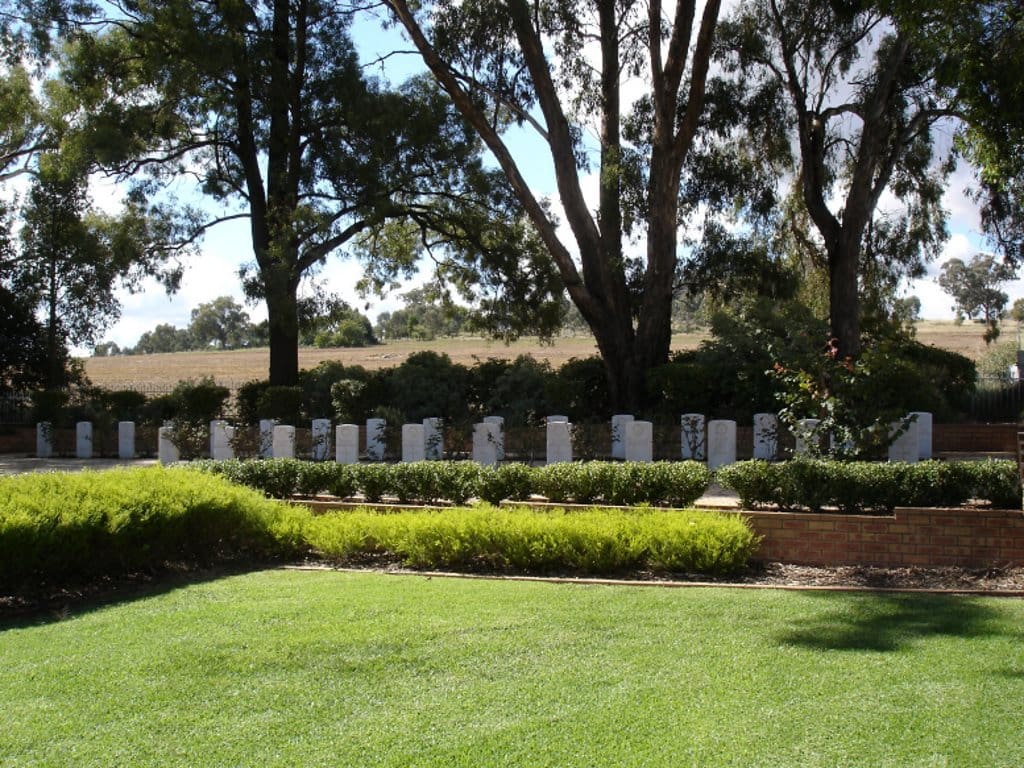
In total the Japanese casualties came to 1 officer and 230 other ranks killed, or died of wounds or suicide and 1 officer 107 other ranks wounded. The dead were buried in the War Cemetery in Cowra.
The total Australian casualties were 1 officer and 3 other ranks killed, with 4 other ranks wounded.
On the day of the breakout, Japanese officers from a neighbouring compound submitted a letter to the Commandant advising that they had assisted the escaping parties by providing advice and any other help they could. In the letter they all request to be shot as accomplices to the attempt. Their request was denied.
A Court of Inquiry was conducted and first sat on 7 August and concluded on 15 August. The main points identified in the report were:
- The conditions in the camp were in line with the Geneva Convention.
- Housing, bedding and sanitary arrangements were on par with those provided for the garrison.
- Food was plentiful.
- No complaints concerning their treatment had been reported by the prisoners.
- The breakout was a premeditated plan.
- Firing was directed only at POWs actively taking part in the attack and was deemed to be at a level necessary to defend against the attack.
- Firing ceased at the earliest possible moment.
- The medical arrangement for the treatment of wounded POWs was satisfactory
At this point it’s worth contemplating what the Japanese hoped to gain by escape. There was no chance of them just blending in with the locals and stealthily making their way to the coast to hop on a boat waiting to whisk them away to Japan. I doubt many of them thought they would be able to hide and survive in a land totally foreign to them. Was it really just about trying to regain a bit of honour, a chance to die fighting or at least show that they weren’t just submissively awaiting their fate?
The inquiry report stated that “the extensive preparations made by the Japanese, the commencement of the mutiny during the hours of darkness and the other attendant circumstances prove beyond all doubt that the onus for the incident rests entirely on the prisoners of war themselves and that it was their intention to engage in suicidal combat with the guards.”
It appears that 235 people were killed for no greater purpose than honour.
Other military items by the author, Warwick O’Neill, can be found at: https://www.australianmilitaryhistorypodcast.com/
You can read more about the author, Warwick O’Neill, here.
