
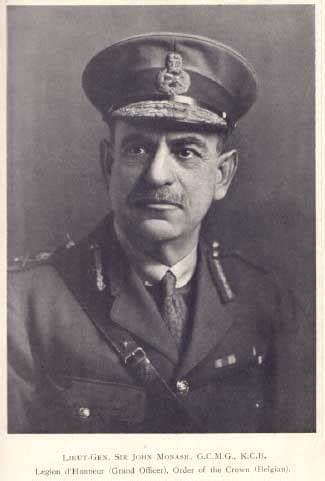
While Sir John Monash rightly holds the distinction of being Australia’s greatest ever General, there was another Australian who came a close second to Monash in the annals of Australian Military History. And it was his humility which partially smoothed Monash’s bumpy road to command of the Australia Corp in 1918. But because of this, he is quite often overlooked when the Great War Generals are discussed.

But who was he?
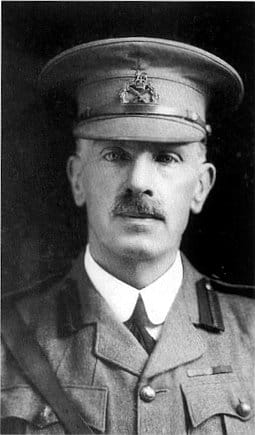
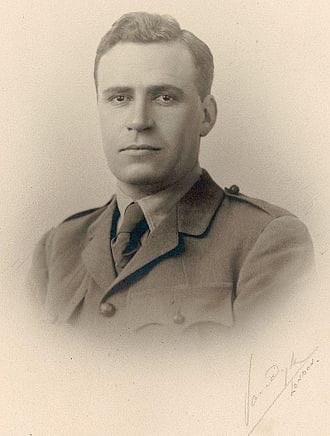
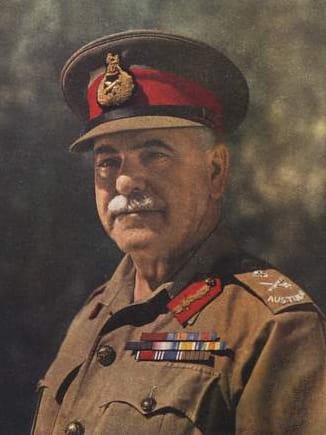
He was none other than General Sir Cyril Brudenell Bingham White KCB, KCMG, KCVO, DSO, better known as Sir Brudenell White or simply as General White, veteran of the Boer War, First World War and Second World War.
White was born in 1876 to Irish parents in the lovely state of Queensland (yay Queenslander). He was educated at Brisbane Central Boys School and had lofty dreams of becoming a barrister but instead he became a bank clerk at the tender age of 16.
He worked for a period of time in the small country town of Gympie, north of Brisbane and befriended a young man named Thomas Glasgow. Glasgow would go on to command the 1st Australian Division in 1918 and now has a large statue in Post Office Square overlooking Anzac Square in Brisbane, a fact which has nothing to do with this particular episode, except for the fact that I don’t recall seeing a statue for White anywhere in Brisbane. It kind of illustrates how underappreciated White really was.
Anyway, Glasgow, with the assistance of a Captain C.B Steele managed to have White commissioned into the 2nd Queensland (Wide Bay and Burnett) Regiment in October 1896. In June 1899 he transferred to the permanent forces, serving with the Queensland Regiment of the Royal Australian Artillery, which then became part of the Australian Military Forces after Federation. Throughout 1900 to 1901 he served with the Battery on Thursday Island as part of an observation force keeping an eye on the northern waters of Australia.
As idyllic and relaxed as Thursday Island must have been back then, (I actually assume it was hot, uncomfortable and generally unpleasant for blokes in full military uniform) White preferred a transfer to the 1st Battalion, Australian Commonwealth Horse and headed for South Africa in February 1902. The Boer War was well into its final stages by the time White arrived in the western Transvaal and he was only involved in some minor operations. In a letter home he stated, “I would have liked to see a little fighting”.
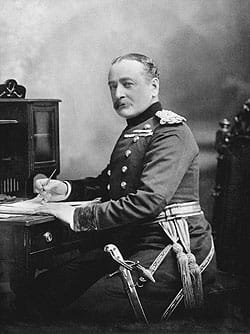
He returned to Australia, and, unlike many of the returned soldiers who went back to the civilian professions, White stayed in the military and, in January 1904, he was appointed aide-de-camp to Major General Sir Edward Hutton, General Officer Commanding the Australian Military Force. The year he spent with Hutton was a pivotal moment in what would be his future career as a staff officer.
He was promoted to temporary Captain and travelled with Hutton throughout the country to establish the level of preparedness of the fledgling Australian Army. It is important to remember that, at this time, the Nation of Australia was only three years old. The six former colonies, prior to 1901, were responsible for raising, training and maintaining their own forces. Obviously, troops from Queensland or Western Australia are likely to have had some significant differences to those trained for conditions in Victoria or South Australia. After Federation, these six separate forces needed to be organised into a force capable of providing coordinated defence of the country, should the need arise.
Being involved in this early stage of the development of Australia’s Defence Force gave White an intimate knowledge of how things worked. It was kind of like knowing your child better than anyone else because you were there at their birth and every day afterwards. White came to know his infant Army in great detail.
White married Ethel Davidson in November 1905 and, a year later, on recommendation by Hutton, he became the first Australian to attend the British Army Staff College at Camberley in the Old Dart, or England as the Old Dart is more formally known. It was here that he really began to show his talent and capacity for hard work. Despite having very little regimental experience, and in the company of young English gentlemen who were born and raised for this life, he graduated well near the top of his class. It was a feat which didn’t go unnoticed.
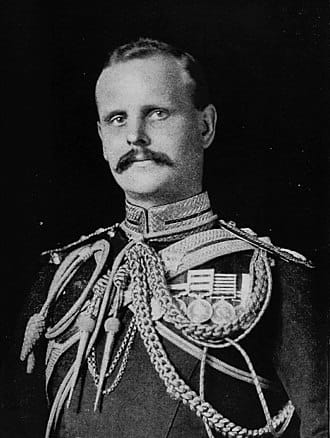
When he returned to Australia, White was promoted to permanent Captain and, in 1908, he joined the staff of the chief of intelligence, Colonel William Bridges, future Commanding Officer and the bloke who came up with the name of the Australian Imperial Forces, the AIF, in 1915. If nothing else, it appears that White was indeed lucky with his associations throughout his formative years in the Army.
He didn’t have long to enjoy Bridges’ company because, by the end of 1908, White was again off to Britain on an exchange program as a General Staff Officer, 3rd Grade at no lesser institution than the War Office. The War Office was the beating heart of the military forces of the Empire, when that Empire was at its peak. While there, White gained immense experience in how large military units were handled at the highest level. He soaked in the planning and administration skills on display around him and made contacts among other up and coming officers of the Empire with whom he would later work.
While at the War Office, White also developed his commitment to the concept of the British Empire. He firmed in his belief that any Australian armed forces must come under the control of the British War Act and that Australians should merely form a part of the wider British Army. This attitude would be one of the main things which set him apart from Monash. Being of German heritage, Monash was never really an ‘Empire Man’. His first and only allegiance was to Australia. As World War 1 ground on, this endeared Monash to his men more than White was able to do. White had the Digger’s respect, but Monash’s view towards an independent Australian force was more in line with what the troops themselves were wanting.
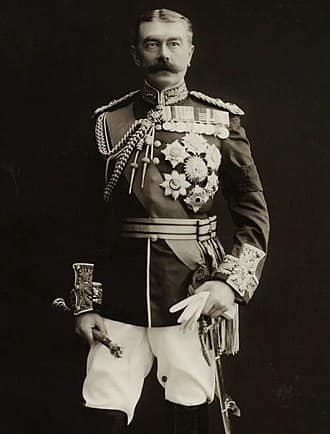
In 1911 White was promoted to Major and returned to Australia in 1912. While White had been in England, Lord Kitchener had toured Australia and inspected the state of the country’s defences and preparedness for war. He laid out a series of directives and plans for the defence of Australia and for those directives to be implemented a first-rate administrator was required. That’s where White came in and he was appointed the Director of Military Operations at Army Headquarters in Melbourne.
He updated Bridge’s mobilisation plans for home defence and he was an enthusiastic supporter of raising a citizen force which could be rapidly deployed to wherever a threat eventuated.
He wasn’t entirely happy, however, about the refusal of many politicians to allow him to implement contingency planning in the event that Britain ever went to war with Germany. “It’ll never happen” said the all-knowing political men – only a mere couple of years before it did happen – on a massive scale, showing that, just like today, politicians back then had little to no understanding of the real world.
Fortunately, there were some wiser heads around and Sir George Pearce, then Minister for Defence, approved of talks with the New Zealand representatives to agree on what actions would be taken if either country was attacked. They agreed that a jointly-manned division would be created in the event of war. These discussions were the genesis of what would become the Australian and New Zealand Army Corp, the immortal ANZACs.
Working in secret, with Pearce’s blessing, White set about planning everything which would be involved in the raising, equipping, training and dispatching of the Australian contribution to that force. In July 1914 he was appointed acting chief of the General Staff, one month before the shot which changed the world rang out in Sarajevo. It was due largely to White’s meticulous planning that, when war was declared, the Australian government was able to commit to providing 20,000 men at short notice to be sent overseas.
To put this achievement into perspective, the commitment was made in August of 1914. By April 1915 a force of 20,000 + troops had been raised, trained, equipped, transported and thrown into a battle halfway across the world at Gallipoli. It took about eight months. By comparison, the United States Army technically joined the war in April 1917, but their troops were not first committed to a full scale battle until September of 1918. That took nearly 18 months. That the Anzacs managed to achieve the feat almost a year quicker than the Americans were able to do, speaks volumes for the planning and preparation conducted by White.
Bridges was appointed to command the AIF and, when it came time to choose his Chief of Staff, there was really only one man he could have chosen. With White, the two men dragged the AIF together from almost nothing. It was important for both men that, although the AIF was to serve as a part of the British Army, the Australians were to maintain their own identity within that Army. Neither man wanted to raise troops who would then be scattered around and absorbed into the various British Divisions. The fact they were able to pull the force together, equip and train it, without relying on English support, went a long way to ensuring that the Australian Training Battalions would retain their integrity throughout the war.
With the AIF safely delivered to Egypt to continue its training, Bridges and White set their minds to planning their part in the Gallipoli Landing. During this period, the AIF and the Kiwis formerly joined forces and formed the soon to be immortal Australian and New Zealand Army Corps, or ANZAC. White had misgivings about the Australian assault at Gabe Tepe. He thought the number of troops available to him was insufficient for the task at hand, but he was a small cog in a large wheel. He simply had to try and make do with what he had.
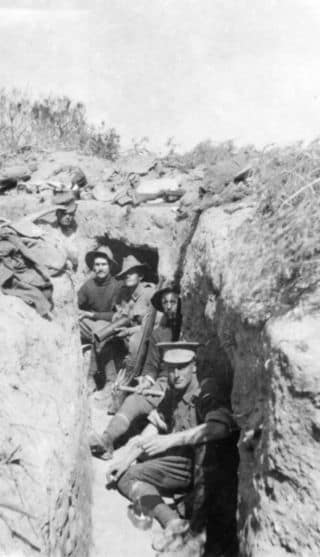
Anyone who knows anything about Australian Military History, which is probably most of the you reading this article, will know that whatever the plans were for the Landing on 25th April 1915 is irrelevant. The fact is the plans fell apart as soon as the boats carrying the Anzac forces left the transport ships and headed in. They landed in the wrong place and instead of undulating hills rising to a plateau with views across to the Dardanelles Straights, they were faced with sheer cliffs, gullies and ridgelines with some rather uncooperative Turkish soldiers on top.
Throughout the confusion of the first day, White worked closely with Bridges as he made his way around the Anzac positions surveying the situation and trying to bring some kind of organisation to the chaos.
By the end of that first day, both sides were exhausted, and it was decided that the Anzacs would occupy a series of positions for the night and resume the attack the next day. These positions would soon become synonymous with the Gallipoli Campaign. Places like Pope’s Corner, Quinn’s Post and Monash Valley. Despite the best of intentions of continuing the advance the next day, events elsewhere on the Peninsula decreed that, for now, the Anzacs must dig in and secure their foothold. The campaign dissolved into a smaller version of the trench warfare of the Western Front.
Bridges and White set about making the best of a bad situation.
Over the following weeks Bridges, usually accompanied by White, began a daily ritual of inspecting the Anzac position. He became well known among the troops who, although not overly fond of Bridges, at least began to respect him. However, his visits were not looked forward to by most of the Diggers owing to his propensity to show himself as a fearless commander. It that quaint, but totally insane British tradition of officers showing a nonchalance in the face of enemy fire, Bridges often allowed the enemy to see him. This inevitably bought an immediate increase to the level of firing from the Turks, making the position even more uncomfortable.
It would’ve been a confusing spectacle to most of the Australians. They respected courage, but abhorred pointless displays. In Bridges they had both in equal measure.
Unfortunately, the Diggers wouldn’t get the opportunity to become too familiar with Bridges. While inspecting the line at Monash Valley on the morning of 15 May, his luck finally ran out and he was shot through the thigh by a sniper. That he was shot in the thigh while inspecting trenches gives an idea of how much he exposed himself to the Turks. Kinda hard to shoot someone in the thigh if they’re below ground level. Anyway, the shot severed both his femoral vein and artery. He was quickly evacuated to the hospital shop Gascon. The doctors felt that he had lost too much blood to attempt amputation of the leg, deciding he’d have more chance of survival in the operating theatre in Alexandria. He didn’t survive long enough to find out. His wound became gangrenous, and he died on 18 May.
In June, White was awarded the Distinguished Service Order for his efforts as a staff officer. But in the cramped, stalemate conditions of Anzac, there wasn’t much call for administrative brilliance. He continued to work to ensure supplies were available and the general administration of the occupying force was maintained, but the battle planning and heroics was left largely to other men.
He was promoted to Brigadier General on the General Staff, ANZAC on 1st October and began working with Lieutenant-General Sir William Birdwood who had permanent command of the AIF at that stage. White would continue working with Birdwood for the remainder of the war with his primary role being the operational and administrative requirements of the AIF and acting as a kind of liaison between the Australian Government and the British commander of the AIF. But that was all to come.
White’s moment to shine at Gallipoli came right at the end with what was, ironically, the only successful operation of the campaign – the evacuation.
The Australian War Memorial website contains a digitised copy of a document title ‘Material Prepared for Evidence Before Dardanelles Commission Evacuation Operations.’ I encourage you to now jump online and search for it. Pages 15 to 21 are a letter from ‘Headquarters, Dardanelles’ dated 20 December 1915 and details the withdrawal. I won’t include it in this tome, but I feel it’s worth reading as it gives a pretty good account of the evacuation from an HQ point of view. Away you go, I’ll be here when you get back”¦”¦ Oh, and here’s the address”¦.https://www.awm.gov.au/collection/C2084676
Anyway, White’s plan for the evacuation from Anzac was broken up into three main phases. First up was a program to condition the Turks to long silences from the Anzac positions. With the front line still fully manned, no noise of any kind was allowed. No shooting, throwing of bombs and no movement. Whenever the Turks sent men over to investigate, they were fired upon to let them know the Anzacs were still there. The Turks assumed their enemy were preparing for the coming winter.
The next phase involved the removal of as much valuable stores and equipment as possible. The artillery was slowly thinned out until only the bare minimum remained. Food and ammunition were put into boats at night, with empty boxes left in their place so as to maintain the illusion of a fully stocked force.
The third phase was the final and most crucial – the removal of the troops. Over five nights, the troops, with their feet wrapped in sacking to muffle the sound of their movements, followed a white line of flour down to the beach. During the day, those who remained were tasked with maintaining activity to make it appear the front line was still fully manned. They moved between different posts, taking pot shots and generally making noise. A game of cricket was conducted on Shell Green in full view of the Turks. And at night, more men left. By the morning of 21st December 1915, White’s well thought out and executed plan had ensured that the enemy had been fooled and entire Anzac position was deserted without loss.

Now, a diversion if I may. Yes, the evacuation was beautifully planned and carried out and White deserves all the credit he has received for his leading part in it. But in my personal, un-educated opinion, I don’t think the Turks were as hoodwinked as is portrayed in most accounts. They may have been unsure of the exact movements, but they had held the high ground since April, they knew the patterns of Anzac as much as the Anzacs themselves. The myth that the Australians and New Zealanders slipped away under the Turks noses is a bit of a stretch.
To my mind it’s more likely that the Turks realised that they had achieved their objective. From day one, their sole intention had been to drive the invaders into the sea. Now, those invaders were leaving of their own accord. Job done. So why not attack when there were only a few thousand troops left? Why would they? Even if there were only 2000 troops left on the final day, if the Turks attacked and each of those 2000 only killed one Turk before being overwhelmed, then that would still be 2000 dead Turkish soldiers. The Turks knew this wasn’t the end of the war for them. They would need as many fit healthy soldiers as possible to continue the fight elsewhere. And the reality is, they had suffered more than the Anzacs had throughout the campaign, which is saying something. They were exhausted, sick and in serious need of rest and recuperation. Why risk lives for no greater purpose than to give the retreating enemy a final kick in the pants?
Anyway, that’s my take on it, please feel free to maintain your own opinions on the matter.
After the evacuation, the AIF and White were back in Egypt, battered and bruised, but battle hardened. Their numbers had also swelled. So much so that the AIF was to be expanded to four divisions. This was White’s bread and butter, and he went about reorganising the command structure of the entire force. New divisions required new divisional commanders and White was a natural choice to fill one of those positions, but alas for White, Birdwood thought it was vital to maintain continuity in the Staff Officer Administration ranks. White would remain a staff officer under Birdwood. Although this was unfortunate for White it was very fortunate for the AIF. White and Birdwood created a kind of double act which would stand the AIF in good stead for the challenges to come in France.
White embarked for France on 29 March 1916.
It was in France where White’s genius for administration paid dividends for the Australians. Although administration work lacks the glory and romance of a battlefield command, no force can hope to perform with cohesion and confidence if the ground work isn’t done to keep the troops in the field. Birdwood’s role was more of a figure head, a person to inspire and unite the troops behind them. He was regularly out among the troops, shaking hands, listening to stories. He was just as at home sharing a cup of tea with a mud-covered digger on the march as he was with sipping champagne with generals in the mess. But his attention to detail and organisation as well as his tactical grasp left quite a bit to be desired. That’s why White was such an important part of the day to day running of the AIF. He was strong in all the areas that Birdwood wasn’t.
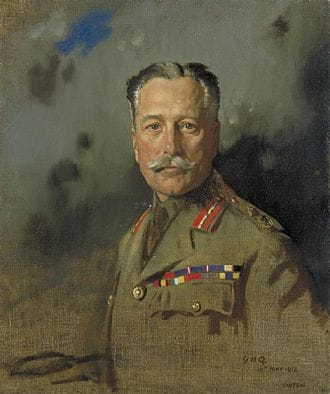
He also possessed a quiet confidence and courage of a different kind to that which the battlefield commanders showed. He wasn’t afraid to stand up to his superiors. Not even General Sir Douglas Haig, Commander in Chief of the entire British army.
Haig’s impression of the colonials was not particularly favourable upon their arrival in France. During the Battle of the Somme, the Australians were thrown into the line at Pozieres. Some initial setbacks drew the ire of Haig who rebuked the staff work of the Anzac Corps. White would have none of it. He presented to Haig a detailed, item by item account of the organisation and operations of the Australians. When he’d finished Haig looked at him, nodded and stated, “I daresay you are right, young man.”
Score 1 to the Australians.
White understood that, during the coldest winter in years during 1916-17, the well-being of the troops was likely to suffer without efficient and effective efforts to keep them supplied in the lines and looked after behind the lines. He organised the building of camps close enough to the front lines to ensure prompt resupply and reinforcement, but far enough back so that those who were taking a break from the line could let their guard down a little and not be concerned about being on the receiving end of a stray bullet. He was becoming more and more known as a man who could get things done and many problems which were bought to him were resolved efficiently.
Strangely enough, White’s advancement in the AIF was being hampered due to his skills. Even Birdwood admitted that he was being kept back on account of his usefulness as a staff officer. It’s another testament to White’s humility that he didn’t jump up and down and demand advancement, but he knew that his ambitions played second fiddle to the well-being of the troops.
It was also during this time that the infatuation of the official Australian correspondent, Charles Bean, with White turned more into what would these days be called a Bromance. Bean nearly idolised White. His performance at Gallipoli had bought him to the newsman’s attention and the admiration had only grown. It was also an infatuation which would lead to the only real blight on Bean’s conduct throughout the war.
However, on 1 January 1917 White was promoted to temporary Major General, although it made little difference to his duties. He was still Birdwood’s Chief of Staff. 1917 would be a tough year for the Allies, and by default the Australians. The twin battles of Bullecourt saw 10 000 casualties for little strategic purpose. The first battle involved Australians being sent forward with no artillery preparation or support, relying only on the untried tanks. The tanks failed, but the infantry succeeded, briefly. A few days later a second attempt was made, with artillery support this time, but the British units on the Australian flanks failed in their attack and the Australians again suffered heavily.
These battles, when added to the Gallipoli fiasco, began to make White re-think his ideals about Australian’s being part of the greater British Army. In correspondence to a senior British staff officer, he stated that he would never again recommend sending an Australian force overseas unless its representative had direct access to the commander-in-chief. In other words, although he still felt the Australians should come under the British umbrella, they should not cede complete control to the English.
During the battles of Broodsiende Ridge, Polygon Wood and Menin Road, the reputation of the Australian soldiers grew. As it did, the calls for bringing the five Australian divisions into one Corps grew stronger. As it became more and more likely that it was going to happen, the search for a suitable Corps commander got underway. It really came down to two men – White and Monash.
White’s administrative abilities gave him a strong claim to the position. He was the man who had, alongside Bridges, built the AIF from next to nothing. He had overseen the expansion after Gallipoli and had nurtured the AIF throughout the tough years of 1916 and 1917. But there were a number of factors going against him.
First, and probably most importantly, he had no real experience in leading men in combat. The Corps commander would be expected to plan and carry out battles. To do so, he must have first-hand experience of the battlefield. Apart from his time on Gallipoli, White hadn’t seen too many battles up close. Monash, on the other hand, had. From Brigade Commander at Gallipoli he rose to be a divisional commander, showing an amazing battlefield genius. Apart from one blip during the August offensive at Gallipoli, Monash had never lost a fight which he had planned.
Also, although White had the respect of the British high command, including Haig, Monash also had the respect of the high command and Haig, but he also had the support of a rather distinguished looking chappy who went by the name of King George the Fifth. Not a bad bloke to have in your corner.
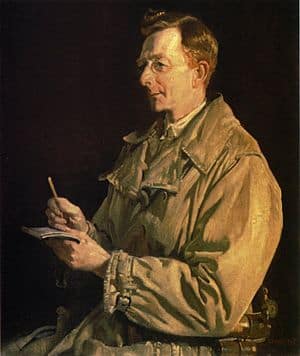
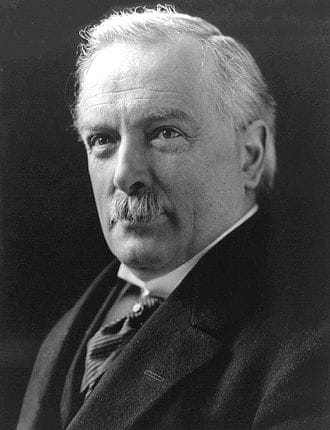
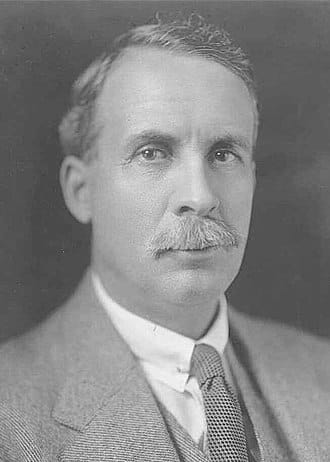
L-R: Keith Murdoch, Courtesy State Library of Victoria; Portrait of Charles E.W. Bean, Australian official war correspondent during the First World War. Painted by George Lambert in 1924 (oil on canvas, 90.7 cm x 71.1 cm). Australian War Memorial catalogue number ART07545; David Lloyd George, 1st Earl Lloyd-George of Dwyfor, OM KStJ PC Harris & Ewing, Public domain, via Wikimedia Commons
White was not without his supporters though. Remember the Bromance? Charles Bean? Bean advocated for White and enlisted the support of Rupert Murdoch’s dad, Keith. Keith was the Prime Minister, Billy Hughes’s, representative in London. He mixed with the British PM, David Lloyd George and carried a fair bit of punch. Bean and Murdoch basically had a couple of things against Monash.
- He was Jewish, not the strong Anglo Saxon type Bean imagined at the head of the Australian army.
- Monash once said that Bean’s writing was lifeless and not of the same standard as Ellis Ashmead-Bartlett, the London Times correspondent at Gallipoli. Bean never forgot this slight.
- Well, they just simply liked White better.
While all this was being hammered out, the Germans had much more pressing things to work on.
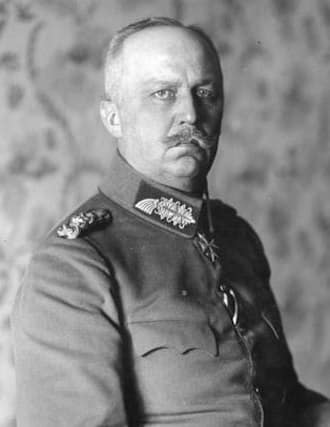
In March of 1918, the Germans launched what they hoped would be the decisive offensive which would win them the war. Operation Michael made full use of the million or so battle-hardened troops freed up after the collapse of Russia. On 21st March, Ludendorff unleashed his attack, aimed mainly at the area held by the British Fifth Army under General Gough and pretty much annihilated them. The ground which had been won at massive cost over the preceding three years was lost in a matter of days. The Australians played a large part in halting the German advance, but that was mostly organised by Monash, so we won’t cover that here.
It was however an important event for White. With Gough finally moved on from command of the Fifth Army, Birdwood was sent to replace him. This meant the top seat of the AIF was now vacant and the Australian Corps, which had by this stage come into formal existence, needed a Corps commander. White and Monash were still the two candidates and Bean and Murdoch continued their scheming. They wanted Monash to be appointed as the General Officer Commanding the AIF, a position which would require him to be removed to England and away from the combat command. White would then obviously be the Corps commander.
To White’s eternal honour, he never involved himself in the correspondents’ manoeuvring on his behalf. He did in fact write to Monash on two occasions advising that he was not party to their schemes and would not stand against Monash for the Corps. Obviously White knew Monash’s abilities and his own and put the welfare of the Australian Corps ahead of his own personal advancement.
That’s not to say White had nothing of value to contribute. Quite the contrary. Birdwood may have become Fifth Army Commander, but he so loved his Australians that he remained nominally the head of the AIF, which meant that White, as he had done throughout the war, took care of the administrative requirements. A task which aided Monash’s plans which led to the Australians’ prominent role in the final few months of the war.
At the end of the War, White was tasked to oversee the Demobilisation and Repatriation Branch for a short period of time and was appointed Knight Commander of the Order of St Michael and St George, mercifully abbreviated to KCMG. He was now Sir Brudenell White and returned to Australia in June 1919.
He was part of a committee set up to consider the future organisation of the Australian Military Force. A number of sensible and important recommendations were devised. On 1st June 1920 White was appointed Chief of the General Staff and pushed hard for the implementation of the recommendations, but the Government wouldn’t come to the party and slashed defence spending. All White was left with was a small nucleus of the force he was hoping for, which he hoped could be rapidly expanded if it was needed.
He finally retired from military life in June 1923. He was appointed chairman of the Commonwealth Public Service Board. He then became Chairman of the Australian branch of the New Zealand Loan & Mercantile Agency and, eventually, he built a small but successful pastoral concern.
Although officially retired from the military, he was on the retired list as a lieutenant-general and when war once again broke out in 1939, he dug out his old uniform and took up the roll of C.G.S in March 1940 aged 63. At the time he said ‘I feel like Cincinnatus called from his farm. And may I say that I much prefer being Cincinnatus at the plough, although I do appreciate the honour paid to me’. His sense of duty was strong, even if the body were weakening.
White appointed Sir Thomas Blamey as commander of the new AIF and pushed for the Australian 6th and 7th Divisions to be brought into the fighting as soon as possible.
While those two Divisions were preparing, he did what he did so well during the First World War, he organised for the training and supply of the 1940’s version of his AIF.
Unfortunately, he was not to have the same impact on the second AIF as he had on the first. Only six months into his tenure, on 13 August 1940, White joined three Federal ministers, James Fairbairn, Sir Henry Gullet and Geoffrey Street on a flight which crashed near Canberra, killing all on board. White was buried in Buangor in Victoria.
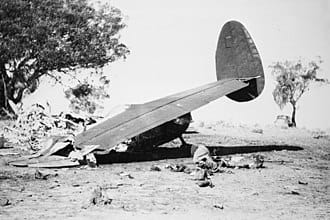
Public domain, via Wikimedia Commons
White was remembered as the tactical and administrative commander of the AIF and Bean described him as the greatest man he even knew. Monash described him as “far and away the ablest soldier Australia had ever turned out.”
Although his achievements have been overshadowed by other great Australian Generals, his name certainly belongs up there alongside Monash and Chauvel, all three being men who cemented the name of Australia on the world stage between 1914 and 1918.
Other military items by the author, Warwick O’Neill, can be found at: https://www.australianmilitaryhistorypodcast.com/
You can read more about the author, Warwick O’Neill, here.
